Showing posts with label fitting. Show all posts

Tuesday, August 19, 2014

Vintage Make Four Progress Report: McCall's 5297 from 1976!

Sometimes I'm not sure why I sew.  It makes me pay a lot more attention to my body much more than I like to and I usually end up feeling like I'm a freak because NO pattern ever fits right out of the envelope!  And then I decide, "Well, I can modify this so it will fit really well."  Even though previous fitting experiences have been quite frustrating, with no clear lessons learned, and no actual pattern at the end that I feel can be used again...so frustration without reward.  As I said, why do I sew?!  And why do I think I can make something fit?!  

Sorry for the rant!  Onward!  
This dress needs a matching jacket.  I have tried a couple of different versions of the one in the pattern (See & Sew B5699), but wasn't thrilled with them.  They're okay, but not that great.  So I was getting ready to go ahead & cut my lovely navy wool & silk/rayon lining (thank you, Mood!), and decided, no, let's try something else.  Digging through my pattern boxes, I came across McCall's 5297 from 1976, which my mom gave me recently. (I think she might have made it for my sister?  I don't remember it being for me.)  Anyway, the jacket looks good, it's with princess seams (which always work better for me), and I just want to shorten it & round it a bit, so it's a bit more like this Mohammed-Make out of some of my beloved West African fabric. I get a lot of use out of this jacket, wearing it over tops or by itself with skirts and dresses.  

So I started a toile/muslin.  And was quickly reminded that even though princess seams are pretty good for fitting me, they're not perfect either...even this wonderful jacket from Mohammed is too loose at the waist.  So, I started playing with 5297 & ended up making it a bit more like the one above. Specifically, that meant turning the front side piece into 2 pieces, like the jacket above.  Essentially I went from 4 jacket front pieces (not including lining & interfacing) to 6.  It took lots of cutting & trimming & pinning, and of course I'm not 100% sure it's right, but I found some free cotton I'd been given & decided to try it all out.  If that works, then I'll get to work with the wool.  You can see to the right that I did lots of tracing/drawing and modifying.  

Frankentoile!
I used lots of scraps from other projects & from old sheets I get at Goodwill.  You can see my Frankentoile to the left, using 4 different pieces. 

One thing that is good (I guess) is that most pattern pieces fit me perfectly through the back.  It's sort of amazing how I match that part so well.  At least I don't have to fuss with that.  Just the sides & front!   

By the end of the day, I had the cotton version cut out, put in a new needle, wound a bobbin & did the back neck darts & center back seam.  A day spent fitting & cutting out & even making a bit of a start on the actual sewing...not too bad!  


Tuesday, November 19, 2013

See & Struggle B5699, continued

Remember these photos from a few weeks back?

A week or so ago, I had high hopes that this See & Sew B5699 jacket was going to be fairly easy.  I had made a toile, was headed off to see Allison at Bits of Thread, and thought I'd have a nice  pattern all ready to cut out by the time I got home that night.  I was so wrong.  

A bunch of problems presented themselves.  Allison did not agree with me that the fit was almost there.  I ended up cutting & re-cutting 2 more toile versions, trying to a) get the fullness out of the waist, and b) trying to get rid of the floppy collar. 

I again (foolishly) thought I was close when I left class that night...

No, that's not blood, but it sometimes felt like it!

But a full week of modifying, darting, & re-darting every night hasn't got me any closer (as these photos illustrate).  I moved darts, added darts, re-sized darts, and did everything I could think of and still...I don't think it looks correct.  

Starlet Suit jacket
In fact, the latest version of the toile looks too small. But I don't really know because I lost the back pieces (which did fit perfectly), so don't have anything to sew the front pieces to! However, just pinning it to Helen it sure looks too small.  So how did that happen?  

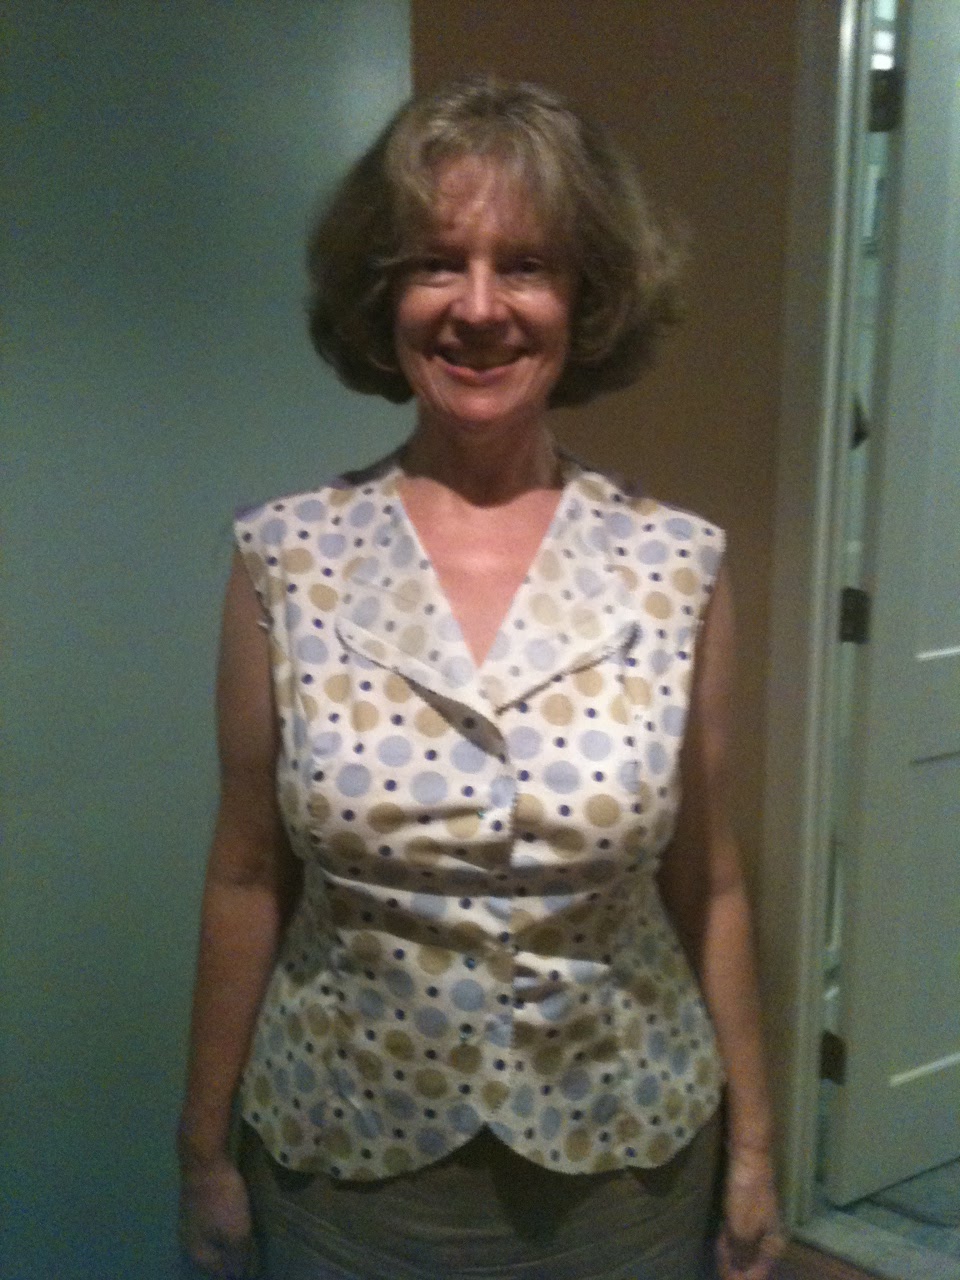
I had to put it all away for a while & start a quick knitting project! But what I've done is dig out the pattern pieces for the Starlet Suit (from Gertie).  That finally fit me, as you can see here.  However, those are princess seams, and I was hoping to get a jacket with a different pattern (why I bought See & Sew B5699 to begin with).  

I find these extreme fitting challenges to be extremely upsetting.  First, I wonder if my body is totally weird; why does one part of a pattern go easily and the other is so painful? And sewing does make you look at yourself pretty closely (and measure yourself), and I don't like doing that at all.  

There does seem to be a bit of hope:  Gertie recommended this FBA tutorial page, from Sew L.A., and I've followed the instructions to the letter.  More on the test version of that jacket (in cotton) next time!

Saturday, July 7, 2012

Miracle Worker or Magician?! Thanks, Allison!

Okay, you know that I've been going to classes @ Bits of Thread in DC.  Although I've been sewing for years (40?!), I still have a lot to learn & have only just recently been proud of my zipper installations, rather than thinking, "Hope no one notices that." (Again, thanks Allison!).  


So a while back I booked a private one-hour lesson to have Allison help me with Simplicity 7501 (which all started when I mixed it up with Scruffy's 7051).  You can read all that blather, which started here.   I had a few problems with that hasty ebay purchase!  First, it wasn't the right size, so I had to make it bigger and move darts around like crazy.  Second, I wanted that collar, so had to change the neckline & design & draw a collar.  It all finally worked out, sort of.  This photo doesn't show the gapping at the front & back waist, which I partly covered up w/ the belt.  


Corduroy for 2 more 7501 dresses;
leaning a bit to the purple side!
But it didn't (work out, that is).  I really wanted to make a bunch of corduroy dresses because they are so perfect for winter & look great with boots, and are so different from what you see in stores.  But it really did not fit too well and there was no way I was making up my other corduroy fabric until I had a pattern that was worth making at least twice more.
Taking off the blue at the top
made such a big difference!


So I went to see Allison, and within about 5 minutes of my arrival, she had figured out that the best fix would be to whack off about an inch from the shoulder (more at the neckline, less at the armscye).  The pattern (which I re-drew from the dress after I'd made the change) is laying on a 1" grid so you can see that the lopping off was rather dramatic.  


I had done SOOO much fiddling with darts and the waistline, but never even thought that the shoulder seam needed adjusting.  Having had other similar fitting issues with patterns & clothing I've bought, I will definitely keep an eye on this area in future.  


This dress is a UFO, which may not be finished until we're back from Spain.  I still need to re-draft the neckline facing & a collar as the first one I did won't fit anymore because of the neckline change.  Stay tuned...

Wednesday, May 9, 2012

My Next Class & a Fun Book

I've signed up for another class at Bits of Threads in DC.  It's Copy Your Clothes, and I already know which pair of pants I'm taking.  I also have so many things Mohammed made, too, that I don't have patterns for, so I think this will be fairly useful.  And to go along with copying my clothes, I also got this book, recommended by both Tilly and my teacher Allison (at Bits of Threads):  Dennic Chunman Lo's Pattern Making. (If you'd like to read Tilly's book review, it's here.)

As I've said before, I love vintage patterns, but have had lots of trouble modifying them to fit me (when I can't get hold of the correct size), so I figure that the books and the classes cannot hurt.

I'm also thinking pretty seriously about getting a sloper made for myself--just so I have a baseline to compare any pattern against.  This site has been recommended by other sewists:  Your Personal Fit

Wednesday, April 11, 2012

Starlet Suit Fitting #6: Where I Learn NOT to Trust My Instincts!

In my last post I noted that after putting in the sleeves on the muslin the sleeves hung about 1/2" below where my actual shoulder is.  I'll show you what I did to make the shoulders a bit narrower, then show you what my sewing book recommends...I was wrong, so wrong.


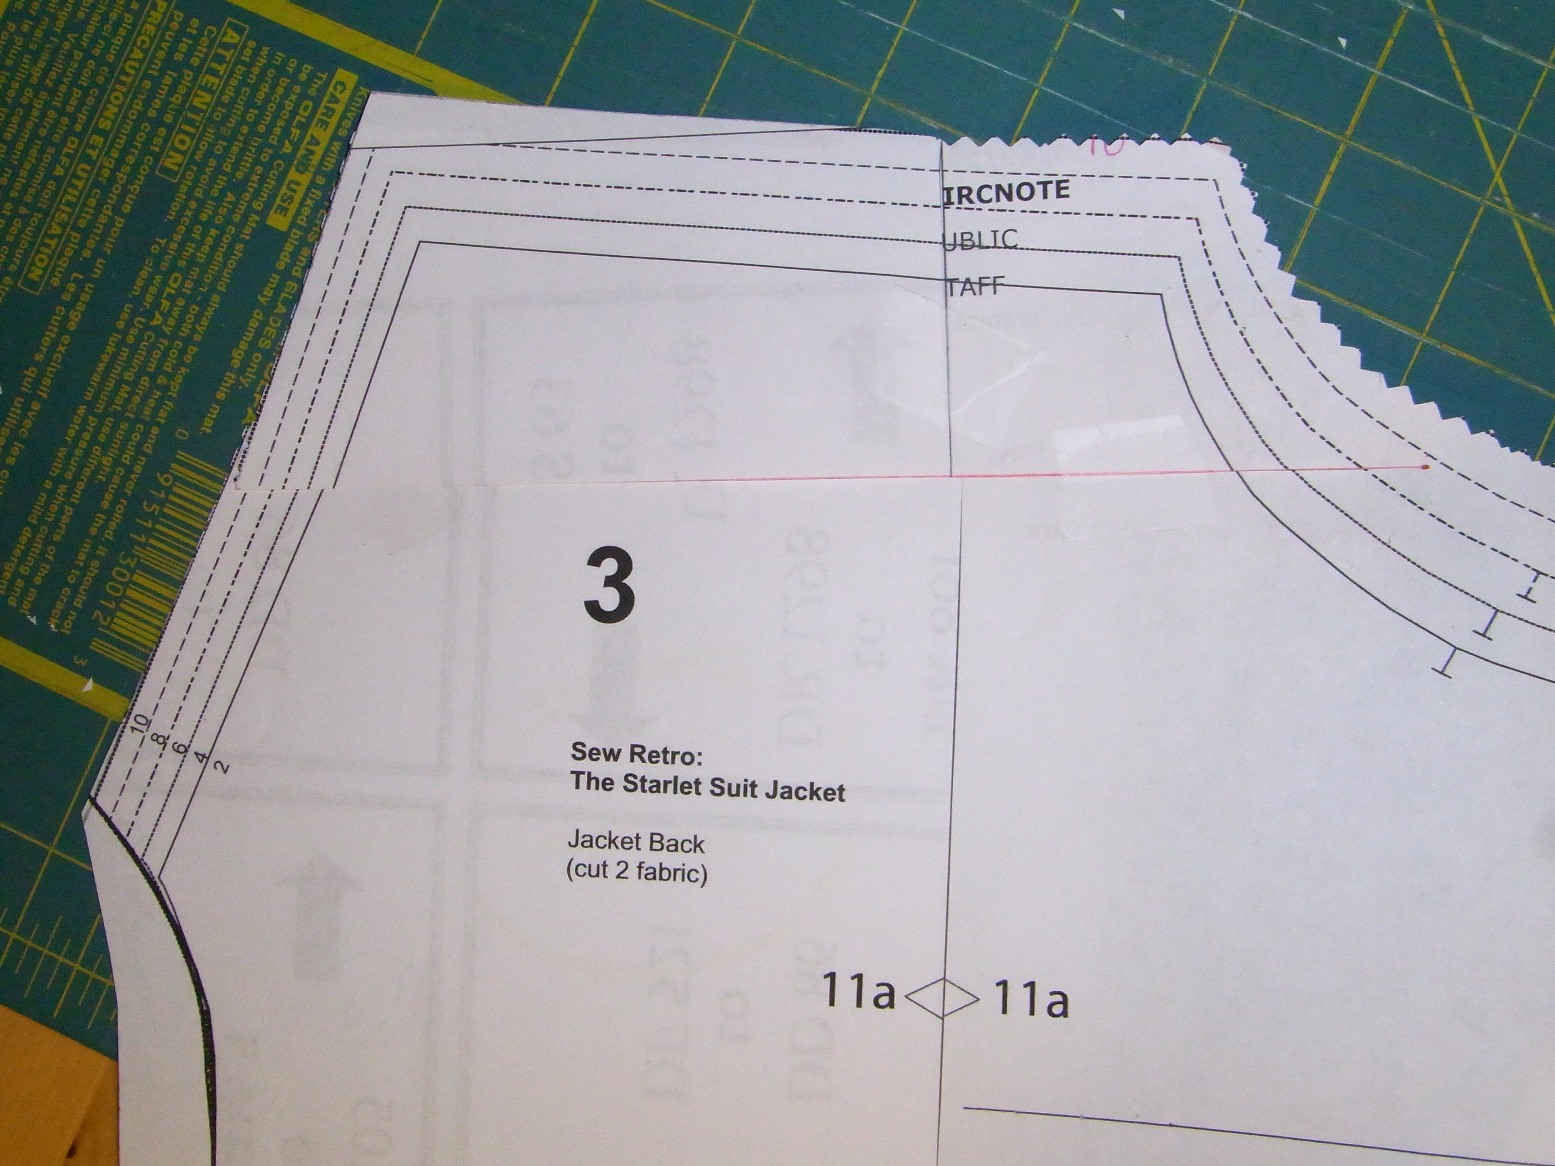
I cut up the pattern (actually just shaved off about 1/2" in a curve), even though I wasn't sure that was what I should do.  You can see the shaved part (in red); I did this on both the front & back patterns.  Now I did try this w/ the muslin (left the sleeves the same, but made the seam on the bodice a 1/2" wider) and it looked okay, on the muslin anyway.


But then I thought, "Hmmmm, I wonder what the book says about this narrow shoulder problem?"  (I use 3 reference books when I'm sewing, if I don't search the web.) For this problem, I found Alison Smith's The Sewing Book to be the most helpful.  


Note: One good thing about an online class & printing your own pattern (even though it's 45+ pages & took me 2.5 hours to tape together): you can keep reprinting bits.  So I reprinted the very top part of both the front & back bodice pieces (didn't need to reprint the whole pattern, just where I shaved off the shoulder).  


So I followed the directions in my book, and did this instead:
I found the middle of the shoulder, then cut an 8" slash straight down.  Then overlapped those 2 pieces to take out that extra 1/2".  Here it is taped & ready for another muslin:
Probably be this weekend before I get it cut out & sewed for my next try...


Of course the music is So Wrong, Patsy Cline!

Sunday, April 8, 2012

Starlet Suit Fit #5

Bella, consultant at Bella Industries, Inc., takes a rare break.

Okay, you all know I'm taking an online class at Craftsy to make the Starlet Suit, and I've spent a lot of time trying to get it to fit.  I was so pleased at the princess-seam adjustments & almost started cutting out the wool...but then I thought, "Hey!  What about the sleeves?!"

So I put the sleeves in yesterday.  They are fine & the length is great--a little different--3/4 sleeves on a suit jacket.  But take a look at the shoulder seam (that's not the right word, it's the top part of the scye where the shoulder seam meets the sleeve).

Pattern-making savants: If you know the right word for that part of the pattern, please let me know! 

Is this the part of my life where I realize I have narrow shoulders?!  Yikes.

If you look at the photos, I've marked where the seams should be & where it is with the arrows...and I think it's about 1/2" off.  Now I'm a bit afraid to just move up the sleeve a 1/2" because I'm worried I may make the armhole too big?  I need to go thru my sewing books & do some looking around on the web.  I may just give it a try on one side, just to see if that's an easy fix.  If it's not--back to the drawing board.

Of course I'm open to your hints/suggestions, too.  Leave them in the comments, below.  And thanks!

Tuesday, April 3, 2012

Almost there! Starlet Suit Fit #3 & #4

I'm so excited!  I played w/ the pattern a bit more yesterday, stitched this up last night & it is SOOOO close! (Thanks again to Opal in Minnesota's online tutorial @ BurdaStyle.)  I will take out a bit of fullness under the bust, but the waist, shoulders, back all look great (look in the amazing Indian tin mirror the roommate got me in Abu Dhabi!).  I find watching Firefly in Spanish to be especially conducive to pattern adjusting.  What does that say about how my brain works?!

I'm using what seems to be the perfect muslin fabric--a king-size 100% cotton sheet set I got at a thrift shop for $6.  It's been washed about a zillion times, so the hand is lovely and they were originally nice sheets, so are fairly thick & drape nicely.  This is the 2nd set of front pieces I've cut out of it & there is plenty left.


As you can see in this 2nd photo, I made a few more tiny adjustments under the bust & I think it's even better now.  For some reason the right side looked better than the left, so the right side pattern fabric pieces are obviously what I'll use when I mark up the pattern one last time.

I have also reprinted the 2 front side pattern pieces again so I'll have brand new pieces to mark up.

I'm beginning to feel as if there is hope!  YAY!!  Now will I have the guts to cut out my fancy wool?

Saturday, March 31, 2012

Update on Starlet Suit Fitting

I have been trying to fit the Starlet Suit, which is a class I'm taking online at Craftsy.  I'm using Opal's online tutorial, which has been extremely helpful.

However, I haven't had as much time as I'd like as I've been busy (kitchen re-design is taking up time, I had to work today, a Saturday, and I was in my Bits of Thread Skirt Pattern-Making class).  You can always look at my facebook page if you'd like to see examples of what our kitchen will look like (cabinets ordered!), and I could tell you in detail about the 45 minutes I spent looking for a dissertation about international law w/ regards to illicit drugs, but it's probably more fun if I show you & tell you about the skirt.

It was an excellent class & I can recommend it if you're in the DC area.  I learned a great way to make a waistband & also the best method I've seen to put in a zipper & have it look great. So there it is, on Helen & I'm quite pleased w/ the wax print fabric from Ghana.  I have some matching cotton & would like to make a light jacket to go w/ it.

So how's the fitting going?  Take a look at photo #2 and see what you think...the BP has definitely moved down to the right place. I also removed the fullness above the bust, now I need to take some out below.  I also took out a little at the side seams...I think I'll remove a bit more tomorrow.  I don't mind the flare at the sides, but there's some at the front, too, so I want to fit that.  The problem with princess seams is which seam (there are 6 altogether) do I remove fullness from? I do think it's an improvement from the previous version.

I will spend tomorrow fitting & sewing.  But first, our typical Sunday morning ritual: drinking coffee & reading the paper in bed.  I haven't read any news for at least 3 days--I have them stacked up to go through!

Tuesday, March 27, 2012

Fitting the Starlet Suit Jacket - getting warmer!

This is the size 10 of the Starlet Suit pattern.  Much better than the size 12 (it fits great across the back), but my next task will be online reading about how to "fit" princess-seamed items and to try some adjustments so the waist is a bit smaller & there's not so much pulling...

And I have been doing a bit of online research (my life is research!), and found a FB adjustment for a princess seam tutorial from Burda Style's Opal in Minnesota; thanks!  So the next bit of excitement will be me trying out her instructions; hopefully tomorrow...

I have to admit, one of the things I hate about fitting is measuring myself; I've been putting it off for weeks.  Finally, after the skirt-pattern class at Bits of Thread, where I had to measure myself in public, I've been getting all the different measurements done & wrote them down last night.  Today I'll use Opal's instructions & try to get the front pattern adjusted a bit.

Speaking of measurements & healthy body images, I came across an article in the paper today about how Israel has banned ads with too-skinny models!  18.5 BMI is the bottom line for healthy, BTW.

I've been singing Debaser all week; it's a good earworm!  And a cover by OK Go!

Wednesday, March 14, 2012

Fitting the Starlet Suit, Part 1

Here's how it is:  I'm working on the Starlet Suit, a class by Gretchen at Craftsy.  Because I bought a lot of fairly expensive wool to make myself 2 suits, I'm making a muslin/toile as a test.  And the first fitting is done & it's too big.  If you look at the attached photos you will see that basically a size 12 is just too big. With any luck that means that my issue in the previous post about the princess seam not looking quite right is just part of the size 12 issue. So my next task is to take apart all the muslin pieces (all sewed at the longest stitch to save thread and to make them easier to un-sew), then re-cut all 6 pieces to a size 10 and try try again.  Or should I say toile toile again?

The first photo shows the back, which definitely looks a little bit too big at the shoulder, and then way  too big under the arms.  The second is the side seam, which definitely does not look the way it should.  On the right, you'll see how baggy it is at the waist.  Part of this is the FB issue, but I'm hoping that a smaller size & the princess seams will help.  Otherwise I may need a narrow belt.


The last photo looks pretty good, really, you can see that the lapels are cut just right & will fold back naturally.


Saturday, March 10, 2012

Toile and Trouble? Starlet Suit Fitting Issues?!

Okay, I haven't done the side seams or the sleeves--obviously.  But I'm already a bit worried.  I don't think this looks like it's going to fit Helen.  Can you see right at the top of the princess seam?  It looks like it's not quite right, and believe me it's been pressed and re-pressed.   Yike-ola.  This is the muslin I'm working on for my Starlet Suit.

Now I know that there's a lot to do before I get worried, but after my 7501 issues, I'm probably a bit toile-shy.  I plan to spend most of tomorrow finishing this & seeing what happens.  And possibly a lot of time trying to figure out what to do to fix it!  But I'll wait to worry...

I'm just using up a bunch of scraps (some of which I got on freecycle.org).  I also bought some king-size sheets at a thrift store to use for my skirt pattern-making class later this month.  

Wednesday, February 22, 2012

7051/7501 Grand Finale!

Well, the most important item on today's post is, of course, our cat, Bella, who likes the new layout in the sewing room.  She immediately found an empty drawer to hide in and looked adorable.

And the next item is the 7501/7051 dress!  Finally...por fin!  If you remember the beginning of this saga was Scruffy Badger's blog about 7051 way back in October (2011!).  I thought, "I MUST have that, too!" And got online & bought a very large 7501, thinking, well, I can size it down.  Not realizing that I was buying the wrong pattern, being old & forgetful & when I got it into my hot little hands I quickly realized, "Uh oh!"  I'd transposed the numbers & bought the wrong pattern on ebay.  So I set about trying and trying and trying to turn the too big wrong pattern into the just right 7501.  (Can I just say here that after getting me started SB still has NOT made her version--and she has the right pattern & started all this?)

I then decided to use my new dress form & lots of extra pieces from my stash & leftover bits to try to make a toile.  I made 4 eventually and cut & sewed & stitched & restitched & and put in darts & moved them & resized them and ripped out stitches & did it again & again & again.  I won't go into the rest of the story (which involves canibalizing another pattern that does fit & then changing the neckline & sleeves).

But at least you can see that it's finished.  I wore it to work today & got lots of compliments! It goes especially well with all my turqouise jewelry.  It's not perfect, but it's good enough.

I'm not dumb enough to think that pattern making or alteration is easy, but I had no idea how hard it was...I just kept feeling like I'd get it--but I really never did.  Another thing is that unlike the Slenderette/Simplicity 2847, this one rolls back on my shoulders.  That is a problem I often have with tops & dresses I buy readymade, but I've never had it happen with a dress either I made, or Mohammed made.  So that's a bit weird.

Hopefully some of these questions will be answered as I take some classes at Bits of Thread & online with Gertie.


Wednesday, December 21, 2011

Extreme Pattern Modification (or, 4th time is the charm?!)

Just to give you an idea of what I HOPE is going to be the last time I show you these pattern pieces..and an idea of what I've been working on...a bunch of made-up & super-modified pattern pieces.

This first one, you've seen.  It's what the Bonus Basic Pattern recommended I do to modify the pattern so it fits better.

The 2nd shows how I had to move the point of the bust dart down.  And up close you can see that I added close to an inch along there to hopefully ease in enough fullness.


The 3rd photo shows what I think the new neck facing should look like (front & back) based on the modifications to the bodice pieces (you'll notice in photos 1 & 4 that it's gone from a round neck to a V-neck).  Also in this photo is the pattern for the collar.  On the other 2 or 3 versions (I've lost count!), this was actually the one thing I made up that worked quite well (here's one example).

However, in that first version, the collar looked great & the facing worked well, but the neckline was quite big (lots of skin showing--not really what I wanted for a cozy winter dress). It's quite cold out at the Reference Desk--there's always a stiff breeze from the A/C, winter or summer, so I really didn't want direct air-to-neck contact, at least not in my cozy thin-wale corduroy dress.


And in the 4th photo you'll see up close how I modified the front neckline.  Then I just used this to create the facing you see in the 3rd photo.

Do I know what I'm doing? Not at all.  Am I going to get to the dress before we leave on vacation?  Probably not.  Will I have a ton of free time when we get home to finish it?  Again, probably not--we'll be moving into the new south wing, a friend is visiting from the Netherlands to do research at the Library of Congress and we're headed to California to celebrate the Roommate's birthday w/ his family.  Hmmm.  But I've heard the winter is going to get quite bleak come Jan/Feb here on the East Coast--so that might motivate me to finish.

Wish me luck in the new year!  And thank you for your kind attention this year...I'm mostly enjoying blogging, but do find it a chore to keep my sewing up in order to write about it! Not really, I love sewing, but am starting to pine for the days I only worked part-time!

Music?  B.i.l.l.i.e H.o.l.i.d.a.y by Warpaint

Monday, December 5, 2011

If at first you don't succeed...

Remember this?  It's 7501, which I bought by accident, thinking I was getting Scruffy Badger Time's 7051!?  Well, tucked inside (you'll see it mentioned on the front of the packet, too) is a Bonus Basic Pattern (in women's sizes).  I'm not sure what that means, because I think it sounds like there's another pattern inside.

But what it does mean is that there is this groovy chart about how to get a pattern to fit.  It has these cool drawings of 6 women (with wonderful haircuts--I want the right hand model's please), and you pick what usually happens to you when you put on a dress made from a pattern: Does it pull across the shoulders because yours are broad? Do you have round shoulders or a small bust?

Then pick a drawing, and follow the pattern adjustment instructions to correct the dress so it's right for you.

Now, if you've been reading about my struggles w/ 7501 (which is too big for me) and trying to turn it into 7051, you are probably wondering why I didn't go straight to the Bonus Basic Pattern right from the start.  Well, I did read thru it, but then defaulted to my (rather lazy) typical response--things usually fit me pretty well and I've never had to make many adjustments except for hems & sleeve lengths (I have short arms).  Also, the Bonus Basic Pattern is really about adjusting or enlarging a pattern, and I needed instructions for downsizing.  So I read thru it & neatly folded it back up & put it into the packet.

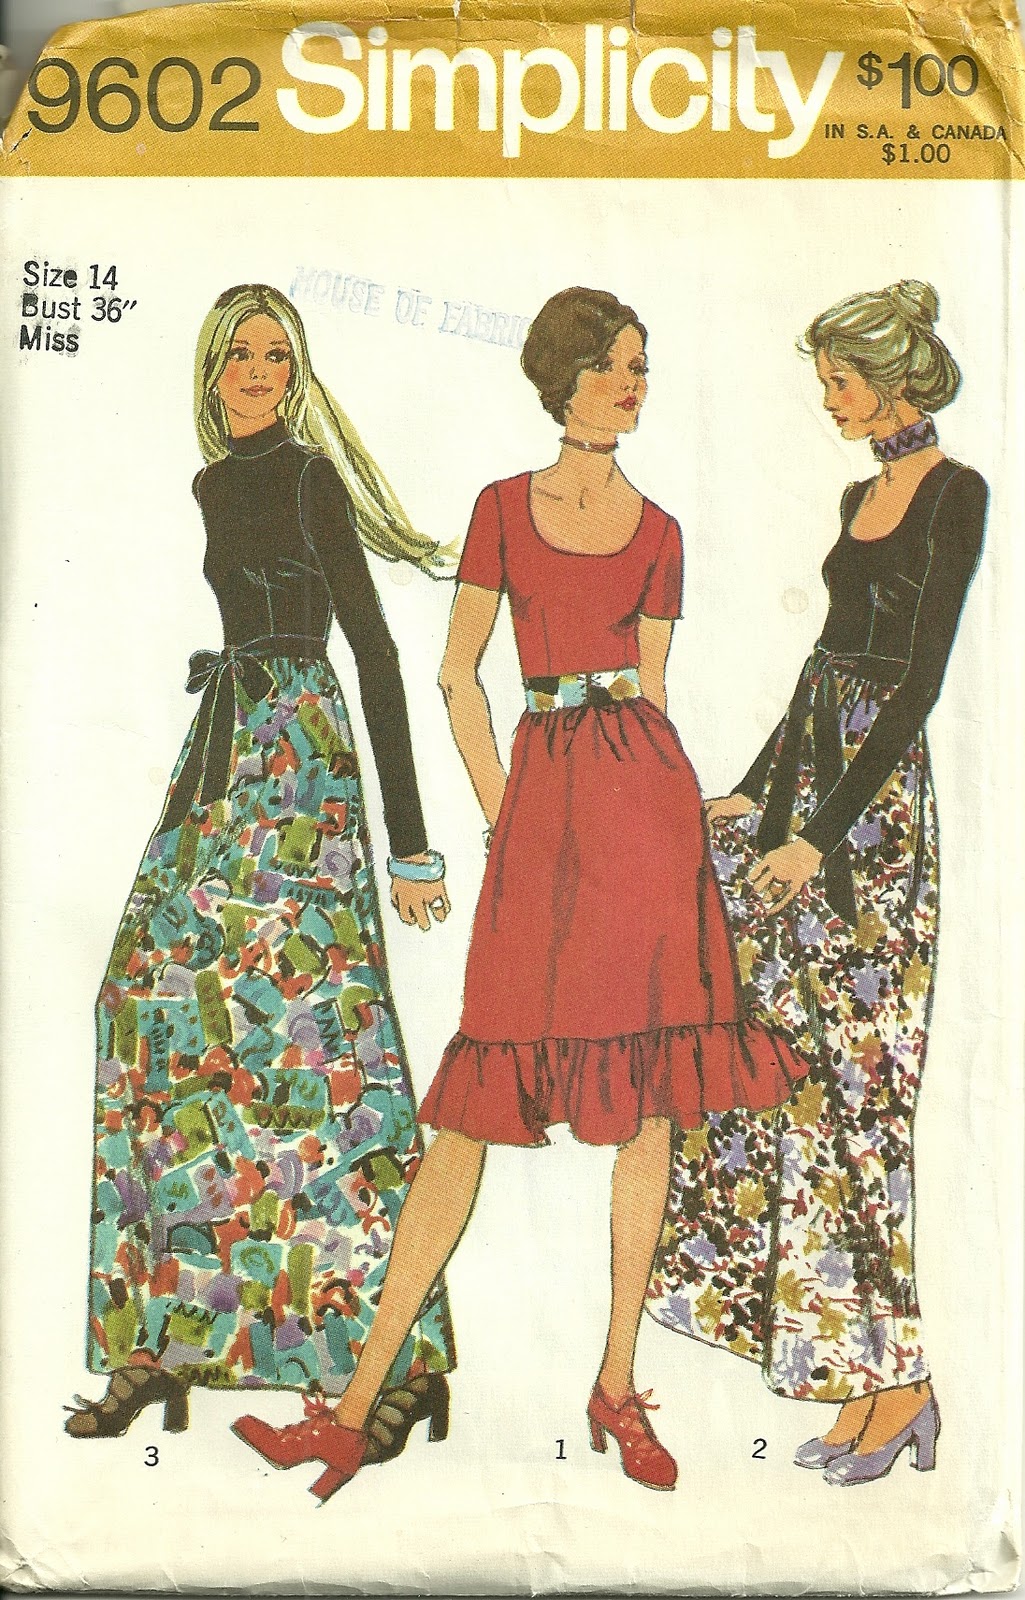
Weeks went by and I went thru 3 sets of toiles, trying to get the bodice right.  (Read all about it here, here, herehere & here.) I finally gave up and decided to modify this pattern, Simplicity 9602, which is from my mom (I remember when she made it for an Xmas party) to give it a collar like 7051.  And that  ended up too small.  So I added where I thought I should to make it bigger.  And it turned out way too big!  Honestly, I almost feel as if I've never sewed before.  I have to keep looking at things I have made, that do look good to remind myself I'm not a beginner!

So now I finally decide to read the instructions!  So here they are (this is the obverse of the page above):
See the top right where it says "very full bust?" That's me. So that's what I did, lots of slashing (I worked up my nerve by reading Tilly's Sleeve Slasher post a few times) and taping.  I couldn't find any pattern tracing paper nearby (haven't been to G Street yet, though) so just made do with used printer paper.  I drew 1" lines on the paper so that I knew things would match up, and started slashing.  I reassured myself that if I totally screwed up, 9602 comes with a 2nd bodice pattern, which is a bit different at the neck, but is the same for the sleeves & darts.  

To the right you'll see my masterpiece, with all the bits measured & taped together.

I found some weird polyester pale green stuff in a box downstairs...a real "Where the heck did that come from?" moment.  But it should be fine for my 4th (yes, fourth) muslin.  I've cut out the bodice & put all the markings on it; we'll see if I get to it this weekend.


Sunday, November 13, 2011

It's all over now, Baby Blue!

I woke up this morning with this song in my head:  Blue Sky, Allman Brothers, Dickie Betts singing.

Actually, I'm pretty happy, so I almost always have happy music in my head.  But that inspired me to try one more time...well, 4 more hours.  I just keep finding that if I made the darts big enough, it really messed up the bottom & sides.  And taking up in the middle (adding a 1/2" seam down the middle of the front on the muslin), just didn't seem to do it.  I also found (and am finding with the pattern I'm now adapting, too) that what fits on Helen, when cut out & sewed doesn't fit...sometimes not even close!

I never thought pattern making was easy; a friend in NYC does this for a living, and she's very much in demand, but I was right--it's difficult.  So I gave up & went thru my vintage patterns & found this one, Simplicity 9602, from my mom.  It's the right size--a 12 in the old size; 1971.  I still have to modify it a bit because I want a V-neck & a collar (still trying to get Scruffy Badger's Simplicity 7501!).  But since I'm starting with the correct size, not 6" too big, I'm hoping this will go better & faster.

I am finding that sewing with corduroy is a bit of a challenge.  I have to pin more & sew slower or everything crawls around.  And I'm used to pressing cotton, or linen, which is so hardy.  I'm using a very light hand so I don't mash the corduroy.  Here's the fabric in case you've forgotten thru all this what it looks like.  I was in Hancock again today (forgot a zipper, so I bought 3), and they still had the pincord (thin corduroy) on sale, so I got more...purple this time!  Another print, of course!

I've missed this class (ends 11/30): Bits of Thread Pattern Making class - Bodice, but this experience has definitely made me interested in taking the same thing, hopefully in the spring.


Saturday, November 12, 2011

Reader, I gave up...or not!

It's been a day and a 1/2.  I am still trying to get this vintage 1967 (too large) Simplicity 7501 to fit correctly. (Here's the original blog where I explain how I mixed up 7501 & 7051.)  And here's Scruffy Badger Time's post about her cool pattern that I just had to have...

I thought I had it on this version, then I had a horrible time getting the back to fit.  You can see on the left what the piece I was using looked like when I started (and that was after many adjustments), and on the right is what actually works & fits!  After what felt like a zillion more adjustments.

I finally got the  back looking okay and realized that, perhaps because of the large darts, that the front was about 2" shorter than it should be. (I figured this out when it didn't match up at the side seams.)  So I had to start w/ new fabric (the green is #3, after the purple & the red).  I could have gone on with the shortened front bodice, but because I was worried about darts, I decided to use up some cheap fabric I bought a while back.  My other thinking was that if it works out, I might actually wear the green dress...

You can see that Bella is very supportive.  She likes supervising me when I'm working.  She especially likes the warm light & the warm computer & playing with thread.  She gives lots of head bumps so that keeps me going.  

So, I got it fitting fairly well, so decided to move on to modifying the neckline & adding a collar.  That took lots of pattern drawing & redrawing, believe me, to get the curves to match at the sides & back of the neck.   But I felt pretty sure that I'd changed the darts enough that it would be pretty close.  Not so.  :-((

I finally got the collar & facing done & tried on the bodice again, and I'm pretty fed up.  Now the front isn't fitting right anymore, though I think the collar & back look good. What the heck is up with that?  I played with it a bit, but can't quite figure out what to do to remove that bulk & get it to fit correctly.  You can see the 2 arrows I drew toward the problem in the picture to the left.  I started ripping out seams before bed & will give the darts yet another look. I'm quite pleased with the collar, though...but am almost thinking the neck is too big for a winter dress.  At the reference desk there's a vent that is always blowing on our necks, so I'd have to wear it with a silk scarf or something.  I do have a ton of jewelry, so a neckline like this is a good way for me to display that collection.  (Ah, yes, there's another collection; this house is full of them, which is why we need the new South Wing that's being added.)

I am going to give it another try.  Or maybe not.  I will see how I feel in the morning after yoga class & a trip to Heidelberg Bakery!

I took a look through some other vintage patterns I got from my mom.  I found 2 that might work, not exactly what I want, but that will work with the fabric I bought.

And I'm rather under the gun on this.  I know once I really start it won't take that long, but I've only got thru this Monday, really.  I just don't have that much time and we'll be away for Thanksgiving and Xmas & then again to California in January...so if I don't get it done soon, it won't be done before spring & won't be much use to me then.  I'll be thinking about spring colors by then!

In the meantime, you'll find me on Bonanza or Ebay looking for a Simplicity 7051 or something similarly cool in my size!

Later...
I'm wondering if a belt would take care of that waist bulkiness?

Thursday, November 3, 2011

By Jove, I think I've got it! Well, half...

Finally...I think this may be it.  See what you think.  I don't know how many time I've re-done the darts, but it sure looks like it's just about right now.  Some way or another when I was taking up the pattern, I ended up w/ too much at the shoulder seam, and not quite enough at the side seam.  But that's easily fixed.

I've cut out the back now & marked the darts.  But when I sewed up the first little waist dart, I didn't do it right; that's usually how I know I need a break, or am too tired to continue.  Generally I find if I just keep going I end up making all sorts of mistakes & the next time I sit down to work the first 30 minutes or so are un-sewing.  So I took the hint from that messed-up dart & went downstairs to deal w/ the laundry & to finish up a fruit salad the Roommate had started.
Back - needs work
Back - uh oh
With any luck I'll get the top finished tomorrow evening (when the Roommate is at a class).  I've decided rather than sew up the side seams for the fitting (this is a muslin, remember), I'll sew up the back seam & leave one side seam undone.  This way I can pin it on myself.  The Roommate is good & patient with these things but I'd rather be able to do it myself, if necessary...

Back - not quite there yet
Update...well, maybe not quite.  The back wasn't quick either.  I had even taken out a bit from the center of the pattern (with a fold, like I did on both sides of the front), but that wasn't nearly enough, obviously. And the darts don't sit right at all; almost as if I've got a bust at the back, too! They are also not quite at the waist.  Onward!  But I'm going away for the weekend so it will have to wait 'til the holiday weekend (11/11) for more work.

Here's a hint where we're headed this weekend!  We'll be waking up in the City that never sleeps...


Wednesday, November 2, 2011

Those Darned Darts! or The Saga Continues

This looks to be a never-ending project!  Hope you're either a) learning something or b) amused by all this.

So where am I now?  I used the original pattern & drew the darts onto my now new piece of muslin (it's that special kind of red & white muslin!), pinned the darts, put it on Helen.  It looked okay, so I sewed up the darts; and re-fitted it to Helen & it didn't look so good...

I took out the darts & tried again--essentially I moved them out about 1/2".  Pinned, put on Helen.  Looked okay. Sewed them up, put on Helen--did NOT look okay.

If you're wondering what that white triangle is in the photo, it's a dart that I just keep moving around to trace onto the pattern.  I figure it's a normal size person bust-dart, so once I get the angle correct it will be the right size & shape.  It probably doesn't show in the photo too well, but I just pinned the neck & the side seams to the dressmaker's friend and marked the fullest part of the bust.  Then I laid my paper dart and pointed that right at the fullest part.  Then I drew on the darts.  I will sew them up later; I have to go pick up the car which is getting new tires for the (supposedly bitter) winter that's got started last weekend.

Later...

I think I've adjusted & re-adjusted about 8 times now!  I do feel I'm getting close.  I finally put in the waist darts, trying to make them a bit wider so they made the waist fit better.  Then I went back to the upper darts, trying to get them the right width at the side seams & at the right angle.

I'm really hoping this pays off in me being able to use it over & over...if not, I'll be pretty upset to put in all this work!  Or maybe it's character building?!

I didn't need to gain respect for pattern designers, but boy, is this difficult.  I'll have to pay more attention at they gym when I watch snippets of Fashion Project Runway.  I have to go to work tomorrow, & we're going to NYC this weekend, so I was hoping to get it done today...not sure whether I'll get back to it before next week.  But at least I feel like I might actually figure it out at this point.