Monday, April 30, 2012

Bound Buttonholes for those who don't like handstitching!

Hey!  Okay, here's a fairly pleasing buttonhole, I think.  I made it using both Gertie's hints and some ideas from Sherry, at Pattern Scissors Cloth.  Before you read my modifications, check out Sherry's notes on bound buttonholes; my notes will make more sense.  Check out Gertie's excellent tutorial, too, but you have to pay for her lesson on Craftsy, part of the Starlet Suit class.  


I don't like hand-stitching & never feel it's as secure as machine stitching, so this post is about some changes I made.  


Basted lines for start/stop & placement
I did use Sherry's suggestion to draw straight lines for where the buttonholes should start & stop, then basting over those lines w/ contrasting thread.  I also drew, then basted, horizontal lines to show where the bottom of each buttonhole would be.  I did this after I had ironed on the interfacing, so the basting would come out easier.  And you should rip out the basting lines before you begin sewing the buttonholes "lips" into place on the right side.  


I used almost the smallest stitch I have on my machine (mine goes to .8, and I used 1.0, but I have no idea what that means in #stitches/inch).  I found that anything larger seemed to pull at the corners & didn't look as neat.  


Some other changes I came up w/ after playing & playing & playing with bound buttonholes (I made 12 practice ones after all!)...


1. Press the narrow sides away from the hole
1. I steamed & pressed the side pieces (narrow part) away from the hole, once I'd made the cut through both pieces of fabric. I just felt like it was in the way for the next part.  This is also a good chance to make sure you didn't cut into the stitching...if you did (I did!), you can turn the binding back through the hole & re-stitch with your machine to prevent fraying.  I'm even wondering if it would be better to stitch with contrasting thread? Then you can see where to stop when you're clipping the holes.  


2. Steamed, ready for machine-stitching
2. I did not manipulate the little mouth pieces that fill the gaps by hand, then tack them down w/ a hand-sewn back-stitch. Instead, I fiddled until they looked nice, then steamed them, so they'd stay put, then I used a very tiny machine stitch to stitch in the ditch. 


I found that with the weave of the fabric, it wouldn't bend that well & stay put with just pins & my fingers.  So I pinned & manipulated & steamed really well to keep everything in place for the next part.  


3. Machine stitched & finished!
3. The next photo shows a buttonhole after I sewed it with very tiny machine stitching.  I admit that the stitching shows, if you look very closely, but this was easier & feels sturdier to me.  


I did everything else pretty much as Gertie & Sherry recommend.  
5 bound buttonholes, all in a row!


I put in 5 buttonholes, as you can see in the last photo.  I like odd numbers; think they look better, and I really wanted one button right at the bustline...


Remember, you can always click on the photos to see the original, larger size. 

Thursday, April 26, 2012

Some Starlet Suit Techniques!

I'm learning lots of new, fun stuff in my Starlet Suit class, so I thought I'd share.  I'm definitely no expert, but I'm enjoying learning about stuff that I may or may not decide to use again.

First, tailor's tacks.  Little bits of thread to mark stuff, especially useful when chalk doesn't show (your fabric is too nubby), or you are afraid of ruining the fabric (silk, perhaps).  Here are some marks for buttonholes I made on the front of the jacket, in the next step I did some thread-cutting to get the pieces of fabric away from each other & the pattern piece.

Second, here's attempt #1 at bound buttonholes.  This is definitely a practice run--there is no way I'd try this on the actual fabric on the first try.  I'm not very good at hand-work, due to a lack of patience & short attention span, so it will take me more than a few tries to get buttonholes that I'd be willing to wear in public!  I am going to give Gretchen's a few more tries, but also want to try Sherry's method.  Anyway, the photo shows the attempt, plus the little clippers/scissors I used.  Gretchen mentions another style, but I think these are pretty strong, so will try them a few more times to avoid buying yet another piece of equipment for this project!

And this is attempt #2 at a bound buttonhole.  (I am using non-matching thread just so I can see what I'm doing.)  This is actually a bit over-sized, just to play with.  It looks better, but it rather uneven (one "lip" is wider).  So now I'll try a few after I figure out what the correct size should be.  I figure if I get 3 in a row that look nice I'm ready to start on the actual jacket front!  

And attempt #3 is below.  I tried laying the "binding" fabric crossways...which didn't work, the grain & thickness of the fabric conspired to make it impossible to fold neatly.  Yikes.  This is why I'm making all these test runs--so my ideas get tried out before they matter.  You can also see that I didn't quite measure right for the size of the buttonholes.

Finally, I just want you to look at this stenciled floor my teacher, Gretchen did for her brand-new sewing room.  Amazalujah!  We've got hardwood throughout our house, all in very good condition, so I won't be trying this, but I almost wish I had a big stain or something because I'd love to do something like this somewhere...oops, I'd better be careful what I wish for.

Monday, April 23, 2012

Sewing Room Rearranging & Ideas

Besides re-painting my sewing room, I also rearranged it.  I still have the same furniture in it, but think I made it a little less foreboding (I'll explain later).  Below you'll see some before/after floor plans, but I'll start off with this little rack from Ikea, which used to be for coats in our previous kitchen.  Now that we have a mudroom w/ a closet shelf & rack, I painted it white & hung it right by my sewing table.  I put ribbons on some of the tools I use regularly (pinking shears, scissors, clippers, rotary cutter, and sliding gauge).  It's great now to have them all on my left when I need them, rather than rumbling through the drawer.  So far Bella has shown no interest in them, so I'm not worried about her hurting herself.

She had a big adventure today, BTW.  She ran outside when I opened the sliding glass door.  By the time I got my shoes on & went out to help the Roommate round her up, she was back at the mudroom door trying to get in.  This has happened before--she spends a few minutes outside then decides it's not that bad inside! Silly kitty.

On the left, you'll see the same hooks being used for my necklaces; thanks to the Roommate for getting those up last week.  It's great to have the necklaces out, too...much easier to find.

When I posted the photos of my newly painted sewing studio in February, I mentioned before & after drawings for the arrangement.  So I thought I'd get those up now...finally.  I just wanted to show one arrangement that I thought would work and then the arrangement I have now, which seems better, though I'm not sure why.  (As always, clicking on a photo will take you to the largest size available.)  All measurements are in inches. All the furniture is from Ikea, I won't put all the links in because I'm not sure it's all still available...the sewing table is 5-6 years old at least.

BEFORE rearranging furniture
Okay, here's the deal:  This first arrangement seemed better because the table fits pretty much exactly under the window; I thought, "Hey, lots of light!" But I didn't like the cabinet where it was; it's tall, and seemed to make the whole room rather dark (walking into a room with a bookcase or cabinet right there by the door was just weird).  Also, with the table against the east wall, it meant the table I use for cutting out was in that dark corner.  There's no overhead light in the room--I've added 3 lamps of varying brightness and I think I probably need another OttLite (daylight lamp).

So after lots of thought, I took everything out, re-painted the room (with the Roommate's help), and am now using this arrangement.  Which seems better; the cabinet, which I don't use too often, is in the dark corner (and I put one of the desk lamps on top of it, so I can use that when I need to get into the cabinet).  What I use more often are the books & boxes that are stored on the shelves (photo here).
AFTER rearranging furniture

Because the gateleg table is now in the corner by the door, it's also closer to the power outlet--meaning I can store the shredder under there.  Bella also finds this an excellent hiding place because she's safe on 3 sides and a heating vent is right there--though is it a hiding place if I know exactly where she is?

I am liking it much better, though the drop down ironing board sort of covers the sewing table & almost touches the sewing machine.  Plus--if I'm ironing something huge, a lot of the weight can be on the table.  Minus--I cannot sew with the ironing board down; however, because it's so easy to put up & take down, that's not an issue.

Music?  My new crush:  Odio Paris - live, doing Cuando Nadie Pone un Disco.


Thursday, April 19, 2012

Shibori no Haori / しぼりのはおり

I want to show you a haori I got the last time we were in Japan.  A haori is a short kimono, worn over another kimono, mostly for warmth.  But originally they were worn by men, and used to protect a kimono from the elements.

This kimono is silk, and you're looking at the back of it in this photo.  It would not be worn with an obi, which is the wide decorative belt.

I have only worn this once--most of the clothing in our collection is for view, not wearing.

What makes this haori especially amazing is the extremely detailed tie-dye technique the Japanese use called shibori. We all know about tie-dye with rubberbands to make hippie t-shirts, but the Japanese, not surprisingly, as a nation of overachievers, have to do it the hardest way possible (with the most amazing results):  with a needle and thread.

Look at the detail of this haori, in the second photograph.  It looks to me as if they made 10-11 little circle knots in each row!  And there are 3 rows in each group...and you can count yourself (if you like) the number of groups across each row on this fabric.  All I have to say is, "I love admiring this artistry, but I do not want to do it myself!"

If you do want to do it yourself, check out this page from Victory Patterns.  It's got a great after picture, with lots of before shots showing the hard work involved in pre-dye stitching.

The final photo shows the oh-so-classy lining of the haori.  Maybe when I get tired of looking at the back I'll swap it around and pull back one of the sides to show the lining, too.

We've been out in our yard a lot, and I despair of getting my sunflowers to bloom in our extremely shady yard (2 huge holly trees, a gigantic oak and a very large poplar). But it's great for all the textiles because just about the worst thing--besides the oil on your fingers--is light.

So...music?  Pavement: Shady Lane

Sunday, April 15, 2012

The Tawaraya Workshop - Textile Museum Exhibition

The Roommate & I went into town in the early afternoon as we wanted to see the Woven Treasures of the Tawaraya Workshop exhibition at the Textile Museum.  The silk fabric was amazing, no surprise there, and they even had some of the ceremonial kimono used by the Imperial Household.  For example, the bridal kimono of the Empress Kojun (Mrs. Hirohito to you & me)!  The Gallery Guide is here.  


But then we went up to see a short film about the director, Kitagawa Hyoji, a National Living Treasure in Japan, head of the Tawaraya Weaving Workshop.  He doesn't just make amazing woven fabrics for court ceremonies now, he recreates 1000+ year old textiles found in Japan's museums & shrines.  This includes not just matching color & weight of the silk, but also reproducing the weaving style.  He spends a lot of time setting up looms & looking through a magnifying glass!  


When 皇太子妃雅子 (Masako-san) was married in Japan, in 1993, of course the kimono were woven at Tawaraya.   A fun exhibit & highly recommended.  
    

Wednesday, April 11, 2012

Starlet Suit Fitting #6: Where I Learn NOT to Trust My Instincts!

In my last post I noted that after putting in the sleeves on the muslin the sleeves hung about 1/2" below where my actual shoulder is.  I'll show you what I did to make the shoulders a bit narrower, then show you what my sewing book recommends...I was wrong, so wrong.


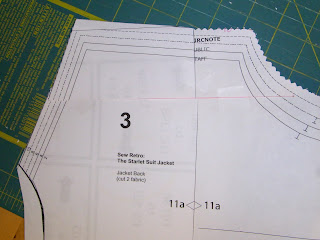
I cut up the pattern (actually just shaved off about 1/2" in a curve), even though I wasn't sure that was what I should do.  You can see the shaved part (in red); I did this on both the front & back patterns.  Now I did try this w/ the muslin (left the sleeves the same, but made the seam on the bodice a 1/2" wider) and it looked okay, on the muslin anyway.


But then I thought, "Hmmmm, I wonder what the book says about this narrow shoulder problem?"  (I use 3 reference books when I'm sewing, if I don't search the web.) For this problem, I found Alison Smith's The Sewing Book to be the most helpful.  


Note: One good thing about an online class & printing your own pattern (even though it's 45+ pages & took me 2.5 hours to tape together): you can keep reprinting bits.  So I reprinted the very top part of both the front & back bodice pieces (didn't need to reprint the whole pattern, just where I shaved off the shoulder).  


So I followed the directions in my book, and did this instead:
I found the middle of the shoulder, then cut an 8" slash straight down.  Then overlapped those 2 pieces to take out that extra 1/2".  Here it is taped & ready for another muslin:
Probably be this weekend before I get it cut out & sewed for my next try...


Of course the music is So Wrong, Patsy Cline!

Sunday, April 8, 2012

Starlet Suit Fit #5

Bella, consultant at Bella Industries, Inc., takes a rare break.

Okay, you all know I'm taking an online class at Craftsy to make the Starlet Suit, and I've spent a lot of time trying to get it to fit.  I was so pleased at the princess-seam adjustments & almost started cutting out the wool...but then I thought, "Hey!  What about the sleeves?!"

So I put the sleeves in yesterday.  They are fine & the length is great--a little different--3/4 sleeves on a suit jacket.  But take a look at the shoulder seam (that's not the right word, it's the top part of the scye where the shoulder seam meets the sleeve).

Pattern-making savants: If you know the right word for that part of the pattern, please let me know! 

Is this the part of my life where I realize I have narrow shoulders?!  Yikes.

If you look at the photos, I've marked where the seams should be & where it is with the arrows...and I think it's about 1/2" off.  Now I'm a bit afraid to just move up the sleeve a 1/2" because I'm worried I may make the armhole too big?  I need to go thru my sewing books & do some looking around on the web.  I may just give it a try on one side, just to see if that's an easy fix.  If it's not--back to the drawing board.

Of course I'm open to your hints/suggestions, too.  Leave them in the comments, below.  And thanks!

Tuesday, April 3, 2012

Almost there! Starlet Suit Fit #3 & #4

I'm so excited!  I played w/ the pattern a bit more yesterday, stitched this up last night & it is SOOOO close! (Thanks again to Opal in Minnesota's online tutorial @ BurdaStyle.)  I will take out a bit of fullness under the bust, but the waist, shoulders, back all look great (look in the amazing Indian tin mirror the roommate got me in Abu Dhabi!).  I find watching Firefly in Spanish to be especially conducive to pattern adjusting.  What does that say about how my brain works?!

I'm using what seems to be the perfect muslin fabric--a king-size 100% cotton sheet set I got at a thrift shop for $6.  It's been washed about a zillion times, so the hand is lovely and they were originally nice sheets, so are fairly thick & drape nicely.  This is the 2nd set of front pieces I've cut out of it & there is plenty left.


As you can see in this 2nd photo, I made a few more tiny adjustments under the bust & I think it's even better now.  For some reason the right side looked better than the left, so the right side pattern fabric pieces are obviously what I'll use when I mark up the pattern one last time.

I have also reprinted the 2 front side pattern pieces again so I'll have brand new pieces to mark up.

I'm beginning to feel as if there is hope!  YAY!!  Now will I have the guts to cut out my fancy wool?