Tuesday, July 30, 2013

More Batik & the Technique of Reverse-Thinking

Purchased in Indonesia, I wore this sarong
quite a bit--now it's part of a bedspread!
So here are some examples of batik, the wax-resist art mostly associated with Indonesia, though we have some African & Dutch examples too.  The first (top) is from Indonesia & is fairly simple.  Essentially you go in reverse...the white is the original color of the fabric, so start thinking in reverse...and start planning! 

Wax is then painted on (or stamped, or even printed, as in the top example), and everything covered in wax stays white, while the artist dyes the next color.  For the two color items, it seems fairly easy...but what about the multi-color fabric?  Thinking in reverse is not one of my strong suits.  Nor is planning!  


These two examples, one hand-drawn, one stamped or printed, are great examples of traditional indigo batik.
Dutch wax-resist, purchased in Muscat.  Also
part of the same bedspread.
This last example, though, was purchased in Java, and is a great example of the Javanese batik technique, which is often multi-colored and extremely detailed.  
Here's a longer (17 minute) video, from Moda Batiks in Indonesia, which does a nice job of demonstrating tie-dye techniques, using a copper stamp, sprinkling salt on the fabric to set the dye, etc.  

The "salt effect" mentioned at 9:45 is, I believe, a difference between soaking the fabric in salty water vs. sprinkling salt.  Soaking the fabric would set all color, whereas the sprinkling/salt effect, along with the sun, means that only part of the color is set, while the sun bleaches out the fabric that didn't get the salt sprinkling.  I hope that makes sense!  

The planning (or ability to think in reverse) is what fascinates me...I'm sure it's easier the more you do it, but I find so often in my sewing that my reverse-thinking needs work!  

Monday, July 22, 2013

Up Next: A Lined Wool Jacket & Dress

Just a few quick photos to show you what I'm working on.  I have a few things on the go...while I'm waiting for the silk to arrive from Dharma, which I'll dye black to line McCall's 8841, I started cutting out this amazing 100% wool from Mood.  It's very texture-y and I love it.  Also, fairly drapy, too, so I think it will look good for the dress.  

I also got some silk/rayon lining in a blue-gray color for the lining...it's also amazing and I got extra (watch out for those Mood one-day sales!), so I'll use it for other things, too...maybe a new slip?

What's in your sewing queue?


Friday, July 19, 2013

Slenderette 2: Fully-Lined & Finished!

Here's my 2nd take on Simplicity 2847, a Slenderette pattern (just love that name!).  I finished it a few weeks ago & have worn it twice--and received lots of comments about people needing a vacation!  

Close-ups of the fabric & the pattern are here.  

The Roommate thought the fabric was for him when I first pulled it out!  I set him straight on that, explaining that it was 4 yards, not 2, so unless we each got matching shirts, I was turning it into a dress.  He decided he didn't need another surf-themed shirt.  

I also fully-lined this with some 60/40 (poly/cotton) I got on sale at Hancock's.  I think I bought 10 yards.  I mostly had the lining figured out but got a bit of help from Allison at Bits of Thread.  

I am still using up bits of my old hapi coat from Japan; I'm really having trouble giving it up.  You'll see to the right that I used it to line the sleeve-cuff, and I also used it for the pocket-lining.  I like having those little reminders.  

This is a great summer dress.  Nice enough that it looks good for teaching or conducting tours at work, but it's very comfortable & has pockets.  I also think it's flattering...although I'm not sure I look slender in it!  But I can dream. 


Friday, July 12, 2013

Western Africa Shirt?! Finished!! Simplicity 6693

I doubt I'm the first person to think of this, but I am so pleased anyway...a Western shirt for the Roommate, made with West African fabric!  *smirk* 

So you saw some previews in the last post, but here's the whole chimichanga!  With the supermodel showing how it's done...

I took lots of pictures for 2 reasons: 1) I'm extremely proud of it and 2) because I wasn't the one having my picture taken!  I do not love being on the other side of the camera.  

This first picture shows the Roommate wearing a BIG smile (it may not look like it to you, but believe me, after 30+ years, I can tell when he's happy--even if you can't!).  I think he likes it.

It was actually fairly easy.  I have really always thought that making men's clothing would be the hardest thing possible, but after 4 pairs of underpants and 2 shirts, I'm feeling less intimidated.  So much so that I'm going to repair some of his Mohammed-made suits which are mostly in good shape, but the lining needs some repair and the buttons need replacing.  I won't be making any ties or suits anytime soon, though.  

I'm starting to realize that perhaps it's the fabric & fitting that makes things difficult, and if you work with cotton and sew for men (who don't need so much fitting), it's not that difficult after all!  

The second photo, on the left, shows the medallion, which appeared by accident in the fabric we bought in Cote d'Ivoire.  I think it looks great & is a super substitute for the embroidery recommended on the original 1974 pattern.  

I was thinking about a Western (African) shirt after seeing Cracker & Camper van Beethoven a few months ago at the State Theatre...then I figured out where to get the pattern from Zoe's post about the shirt she made for her husband.  

I really love how the big print & the little print work together, too.  

Some of the stuff I learned while making this pattern...

First, the collar band.  I was so confused at first I tried to just sew the collar on, the way I do with my clothes.  But then I went and looked at some of the Mohammed-made shirts the Roommate has & figured it out quickly. So I took it off & did it again.  (I was glad to see even Tasia has do-overs!)

You can see the collar band up close in the 2 photos below:


And second, how to put on pearlized snaps.  Which you don't need a special tool for; the instructions on the back of the Dritz snaps are very good. And very good for working out your frustrations! 


The photo above shows the button placket detail, with the snaps, and also with my extra attention to detail.  I have mentioned before how often in West Africa we noticed they use the fabric right up to the selvage.  Why not? It saves hemming & you get a bit more additional fabric.  

The fabric I used had great selvages on both the large & the small prints. You can see how I incorporated it into the placket, which I think looks pretty darn cool! That same selvage also worked to line the edge of the slash for the cuffs.  You can see that in the detail to the right.
Pocket with snap!

The pocket was another area where I used the selvage.  Here's the London Wax Prints & the RB mark which show on the pocket upside down.  But that way the Roommate can read it!  I did not put the snaps on the pockets...couldn't quite decide if it needed them; I may still do that.  


A few more pics below and I'll stop.  I hope this inspires you to try something (somethings) new, too!

And I think the appropriate music for this particular episode?  Euro-Trash Girl by Cracker!


Someone is on summer vacation & hasn't been
near the razor much!

Friday, July 5, 2013

Reverse-Thinking (aka Planning)

You'll see from my posts about batik and ikat that one thing that really impresses me about these techniques is the planning required to think "backwards."  By which I mean starting out with the lighter color, then going darker & darker to create a multi-colored piece of art.

As I've mentioned before, ikat & batik are the 2D/textile versions of relief carving techniques for wood or marble...both of which completely mess with my brain.

What it comes down to is planning.  Which I think I'm pretty good at, but when sewing I often find that maybe I'm not as good as I think I am!

For example, the Western shirt I'm making for the Roommate, Simplicity 6693, which I found at Etsy after being inspired by Zoe's shirt for Paddy.  I decided to use this wax print we got in Cote d'Ivoire for the contrasting yoke & cuffs, because though it's amazing, it's a huge print, which I can't get anywhere near my body--the hugeness might overcome us all--and there's not really enough to do much with, other than pillows.  

(Maybe I mentioned that most fabric in West Africa is sold in 2 yard or 6 yard pieces?  Because 2 yards are needed for a pagne, from which you can make a skirt, a top, a headdress, or a carrying cloth for your baby.  So that's why I didn't buy a whole lot of fabric...I was going for variety so bought many 2-yard pieces, or smaller scraps, rather than a few 6 yard pieces.  We brought home 80 pounds of textiles, leaving almost everything else we had taken behind, so I wasn't going to waste space or weight on big batches of a few samples.)

Anyway, so, without really thinking I cut out the contrasting yoke & cuffs.  Then, when I went to sew the yoke onto the shirt, I saw this:  

Without noticing, I had a huge medallion right in the middle of the contrasting yoke.  Except it wasn't exactly right in the middle, darn it!  It was about 9pm, so I decided I'd take a look in the morning.  

This often happens when I make a mistake.  I walk away from it, especially if it's getting close to bedtime, because I often find I just make even more mistakes, which require more ripping out & re-sewing.  I also very often have to talk myself into the ripping out/re-sewing part!  I am essentially quite a lazy person & avoid do-overs whenever possible.  I'm much more of a make-it-work and hope no one notices girl.  

So I get up Saturday morning, take a look at the shirt, and though I know that the Roommate wouldn't notice, and probably most people wouldn't either, the amazing medallion will be most effective if I un-sew/re-cut/re-sew.  And really, I brought the darned fabric all the way from Ivory Coast...why not use it well?!  And after yoga...

Here's the new yoke, after the re-cutting.  I think you'll agree that it's going to look great...and sort of goes along with the suggested embroidery featured on the pattern's cover.  

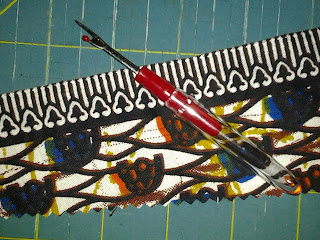
My least-favorite, but most-used tool, along with a preview
of the main fabric for the Western shirt.