Brief update on my Vintage Pledge 4, McCall's 5297. (See last week's post for my rant on fitting.) You can see the gorgeous batik I'm using for the jacket (on sale at Hancock), and the blue is some silk I've dyed to match for the lining. And speaking of linings, there's Connie Long's masterpiece, Easy Guide to Sewing Linings.
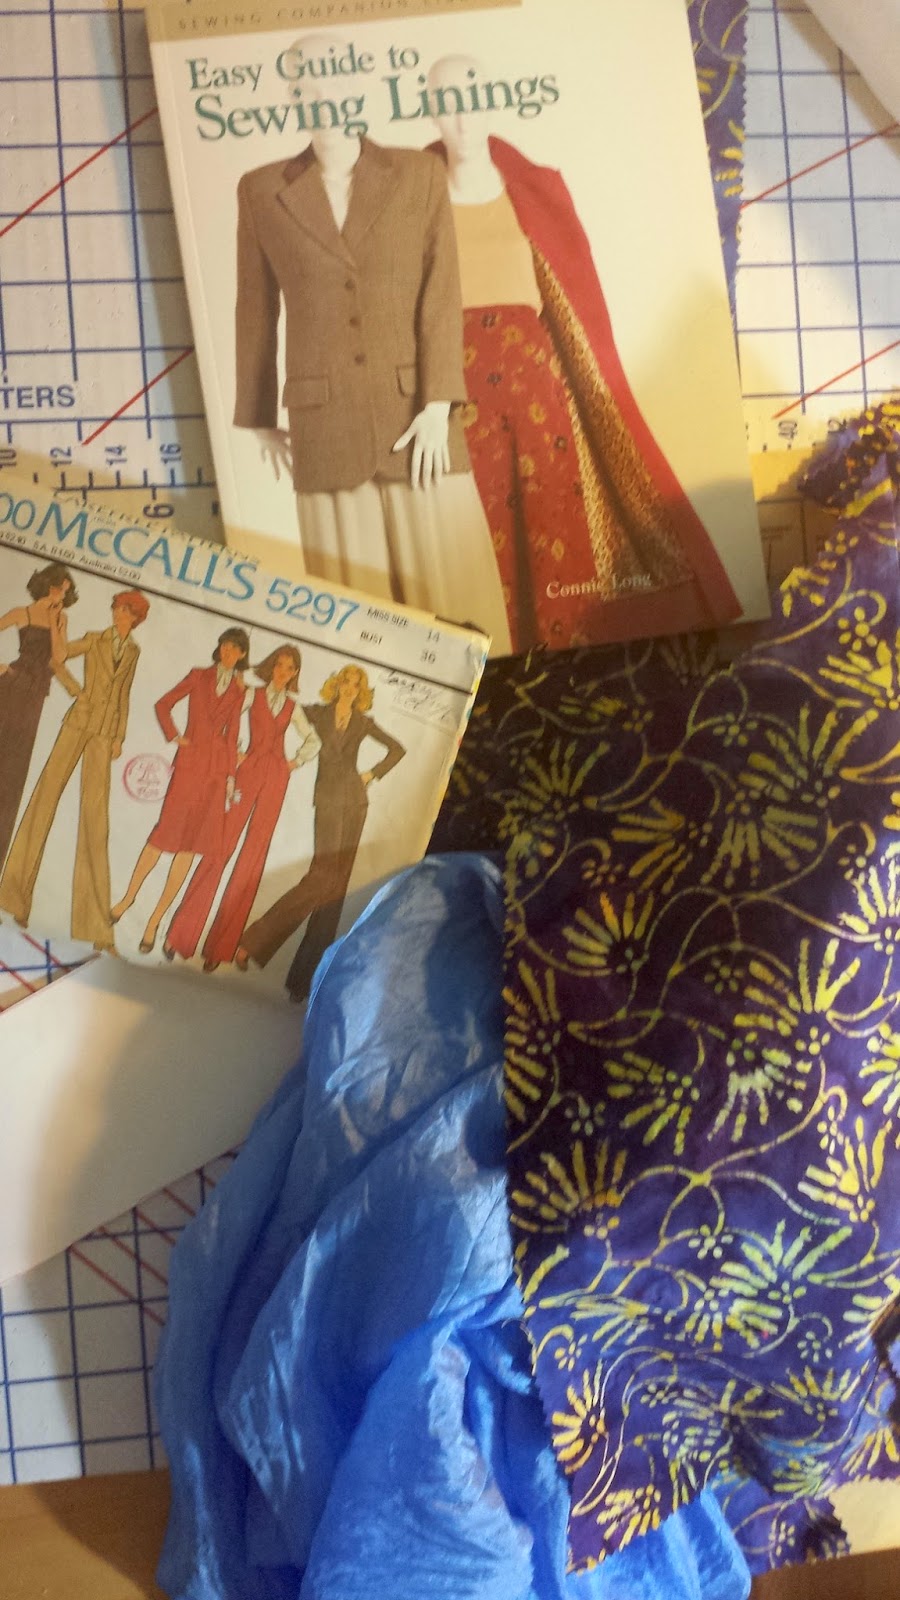
About that silk (which I also used on this Vintage Pledge item), it's silk habotai, 5mm weight, from Dharma Trading. In order to get a "deal," I bought a whole bolt (about 50 yards). I must be nuts!/But it was a deal! I'm slowly getting through the 50 yards, but it will take a while. If I ever get all the projects done that are in my head, it will be used up; I promise.
I also would like a bolt of 8mm habotai. This 5mm silk is lovely, but very light, and it needs to be sewed down as it doesn't have enough weight for gravity to keep it down. For example, I'm thinking of making a slip with it. And I will probably just double the fabric for all the parts, so there's a bit more weight and it will behave under a dress.
Also, I mostly buy my dyes from Dharma, too, because silk dyes are special. Meaning that if you buy non-silk dye (like Rit), it will work great on cotton, but won't do a thing for your silk. Follow directions carefully, and don't use your dying utensils for anything but dying. I keep all these items in our basement, well away from the kitchen.
Finally, I'm still having a few more fitting issues, but I think I'm pretty close to getting this pattern modified to suit me. If I get a princess-seamed jacket that fits me out of this torturous fitting process, I will be pretty darn happy. Wish me luck!
Showing posts with label vintage-pledge. Show all posts
Tuesday, August 26, 2014
Tuesday, August 19, 2014
Vintage Make Four Progress Report: McCall's 5297 from 1976!
Sometimes I'm not sure why I sew. It makes me pay a lot more attention to my body much more than I like to and I usually end up feeling like I'm a freak because NO pattern ever fits right out of the envelope! And then I decide, "Well, I can modify this so it will fit really well." Even though previous fitting experiences have been quite frustrating, with no clear lessons learned, and no actual pattern at the end that I feel can be used again...so frustration without reward. As I said, why do I sew?! And why do I think I can make something fit?!
Sorry for the rant! Onward!
This dress needs a matching jacket. I have tried a couple of different versions of the one in the pattern (See & Sew B5699), but wasn't thrilled with them. They're okay, but not that great. So I was getting ready to go ahead & cut my lovely navy wool & silk/rayon lining (thank you, Mood!), and decided, no, let's try something else. Digging through my pattern boxes, I came across McCall's 5297 from 1976, which my mom gave me recently. (I think she might have made it for my sister? I don't remember it being for me.) Anyway, the jacket looks good, it's with princess seams (which always work better for me), and I just want to shorten it & round it a bit, so it's a bit more like this Mohammed-Make out of some of my beloved West African fabric. I get a lot of use out of this jacket, wearing it over tops or by itself with skirts and dresses.
So I started a toile/muslin. And was quickly reminded that even though princess seams are pretty good for fitting me, they're not perfect either...even this wonderful jacket from Mohammed is too loose at the waist. So, I started playing with 5297 & ended up making it a bit more like the one above. Specifically, that meant turning the front side piece into 2 pieces, like the jacket above. Essentially I went from 4 jacket front pieces (not including lining & interfacing) to 6. It took lots of cutting & trimming & pinning, and of course I'm not 100% sure it's right, but I found some free cotton I'd been given & decided to try it all out. If that works, then I'll get to work with the wool. You can see to the right that I did lots of tracing/drawing and modifying. ![]() |
| Frankentoile! |
One thing that is good (I guess) is that most pattern pieces fit me perfectly through the back. It's sort of amazing how I match that part so well. At least I don't have to fuss with that. Just the sides & front!
By the end of the day, I had the cotton version cut out, put in a new needle, wound a bobbin & did the back neck darts & center back seam. A day spent fitting & cutting out & even making a bit of a start on the actual sewing...not too bad!
Tuesday, August 5, 2014
Slenderette Tropicale - Simplicity 2847, 1958 - Done!
This is my third Vintage Pattern Pledge item for 2014! It's also the 3rd Simplicity 2847 Slenderette pattern I've made; older ones here. I love a shirtwaist!
And here I am modeling it in front of our garden, which we began working on in earnest this year (as opposed to just mowing the grass & ignoring it). It's coming along quite well & is mostly native plants now. We've been in the house 3 years now, and have done lots inside...it was time to stop being bad neighbors & spruce up the front.
The Roommate & I also made the low slate wall you see...we are inordinately proud of it & it looks great--really adds a lot to the yard. All of which is a way of saying, this is why I haven't been sewing much, and why the one thing I have been sewing has taken forever!
Another reason it took forever? Because it's fully lined with silk & I used Hug Snug seam binding all over the place. It looks great inside, as you can see. I do love this pattern! It's got pockets, which I always look for on a dress.
It's a really interesting pattern also because the bodice front & back have the sleeves built in...meaning no sleeves to inset, which I hate.
It does have lots of buttonholes, though, which makes up in difficulty/impatience for the lack of sleeves! The buttons are juniper, and we got them in Tallinn when we were there about 2 weeks ago. I bought 8, not really sure what I'd do with them, and then got home & realized they'd match perfectly with the Tropicale.
I get a lot of use out of my other Slenderettes, so I'm expecting to wear this quite a bit over the next few months before fall sets in.
Tuesday, April 1, 2014
More Western (African) Shirts...for Friends + 2 Vintage Patterns Sewn!!
The Roommate's Western (African) shirts have been well-received all up & down the East Coast. We were having dinner w/ some good friends near Union Square & I got a request to make another western shirt. So, I came home & went thru the remnants of my fabric from West Africa, and found one piece that I thought would be good for the contrast. The problem was finding main color to show off the wax print. I didn't have any, or not nearly enough; my source for West African prints (G Street) didn't have any, so I broke down & bought some Marimekko (on sale at Crate & Barrel outlets) for my friend, and a very tiny print for his little boy. (There was no way I could make dad a shirt without making a tiny one, too!)
Oh, and they are both from vintage patterns! For you #vintagepledge sewists out there! Simplicity 6693 is the men's pattern, and McCall's 7456 is the boy's pattern (I made version E).
Above is the back of the little boy's shirt. I was especially pleased how the diamond design worked (and look at how well the collar matches!). This is some crazy fabric! I was cutting everything from the same piece, but there are so many different designs, I was able to get lots of different looks from it.
And here is the dad's shirt. The wax print looks amazing with the Marimekko, huh?!

Even the green placket is from the very edge of the fabric! Though it sort of looks like chile peppers on it. Or xmas-y. But I couldn't resist using as much as possible of this amazing textile, in honor of the Africans who don't waste any of their fabric.
Because this is the fabric that keeps on giving, I was able to find plenty of 'centerpieces' to use on the front & back yokes.
One thing I really worried about was fitting. Our friend is a much different shape than the Roommate (besides being 20 yrs younger!), so I knew that my current pattern wouldn't work. So, said friend took off the shirt he was wearing, in the restaurant & gave it to me (he had a t-shirt on underneath)! I did lots of measuring of that shirt then re-traced the whole pattern, incorporating those measurements, onto a different set of pieces. (Next post will be about storing those pattern pieces.)
A few more detail shots below.
And, my friend, modeling his new shirt. I was so pleased...I sent it to his office & he didn't wait 'til he got home to try it on, instead sending me a picture from work. (I'm the same way, I still wear new shoes home from the store whenever possible!) I'm thrilled!
Subscribe to:
Posts (Atom)


