Tuesday, November 4, 2014

Modern Kimono at the Met & さよなら

If you'll be anywhere near the Metropolitan Museum any time soon, I can heartily recommend 2 exhibits.  First, Grand Design: Pieter Coecke van Aelst and Renaissance Tapestry, huge tapestries, all from the 16th century, with amazing colors & details still gorgeous after all these years.  It runs thru 11 January 2015.  But I couldn't take photos.  

However, we also made it to another great exhibit, also currently at the Met, Kimono in Modern History, which runs thru 1/19/15, and we could take pictures.   So I thought I'd share a few with you (the Roommate took most of them).  

First off, the patterns were amazing.  Wonderful & graphic, just the way we like 'em!  Keyboards & sheet music, stained glass, circuit boards (?). So much fun.  

And one with cameras!  The text says FILMCAMERAFILMCAMERAFILMCAMERAFILM...

Many were classically Japanese (or what I think of as classic).  Stylized nature, with striking colors & interesting scale & repetition.  I love these unrealistic red & white waves with the little water drops in turquoise.   

Below is a chrysanthemum, but forgive yourself if you think it's fireworks...I think the artist was playing with us, especially by putting them against that dark blue background.  

Old kimono & yukata were made into new with some wonderful recycling. The first is a farmer's jacket from 1925-1950.  Using old yukata, which were cut into strips & re-woven, it's a heavy jacket with a wonderful abstract pattern.  

Next is another farmer's jacket (probably belonging to a woman) made using a patchwork of old silk kimono.  Yukata & kimono wouldn't be thrown away when they were worn out...instead they were re-used & turned into something as good as (or better?) than they were before.  

This is just a small taste (I wish the photos came out better, but of course we were taking them thru glass), and I didn't show any of the heavily embroidered and ornate kimono that were for weddings or the upper class.  All lovely.  Just a wonderful show, with many different styles and many examples.  

I must also mention the Matisse Cut-Outs exhibit at the MoMA, too.  It's amazing (I've been twice), but not really textile-related (though Matisse loved them & painted them a lot, there aren't really any in this show).  It is inspiration-related, though, so worth the lines.  

Finally, I'm saying さよなら. In English that's goodbye.  I started this blog over three years ago (6/19/11) because Tilly encouraged me to.  Although I enjoy her blog, along with many other sewing blogs, I really hate writing!  (And I have to say I avoid it at all costs...so why did I start a blog!?)  I have lots of things to write about, but often struggle to come up with something, or an angle on what I'm writing about, and it feels like torture.

Many sewing bloggers have developed their passion into a business. They seem to be able to turn out lovely finished items as quickly as a factory.  Although I admire their business-savvy & hard work, I don't want a business (I love my government librarian job), and I don't complete that many items in a given year because I love working in my garden, riding bikes with the Roommate, cooking, reading, etc.  I really hate the idea of turning my hobby into a scheduled deadline-driven activity.  I love deadlines at work; at home, not so much.

The last year or so I've really dreaded trying to come up with something to blog about!  Even this blog post took me a few weeks (thank the gods for two recent NYC trips!).  I'd really rather be sewing than blogging. So in the words of the immortal Gary Larson, "Adios, Amoebas!"

Tuesday, October 28, 2014

A few notes about fabric shopping in NYC and Yinka Shonibare

Last Friday I went along on a fun field trip with other students & teachers from Bits of Threads, to the NYC Garment District.  Hard to believe how much is jam-packed into this 1/3 square mile.  Besides Elliot Berman & Mood, the notions shops are irresistible.  (I took one regular-sized backpack: when it was full, I stopped shopping & headed to the MoMA to see the Matisse cut-outs show again.)  And if you get tired of fabrics (or are traveling with a Roommate who might get bored), the Empire State Building & the main branch of the New York Public Library & Bryant Park are all close by.  NOTE: Bryant Park is especially fun this time of year with a Christmas shopping festival & an ice skating rink!  

Here is the Garment District's official map (in PDF form), if you're headed there yourself.

Right next to Elliot Berman, at 237 W 35th St, I found Butterfly Fabrics, and they had an amazing selection of West African wax prints, along with wonderful embroidered Indian silk, sari fabrics, and raw silk (reminded me a lot of being in a fabric store in Abu Dhabi).  I *only* bought 27 yards of the wax prints, and the only reason I didn't buy more was because I couldn't figure out how to carry it!


Speaking of wax prints, Yinka Shonibare has an interesting take on these fabrics and their meaning. He's a Nigerian-English artist, who uses West African wax prints to show the legacy of colonialism.  (Here's the page about him on Wikipedia.) I can't ever resist wax prints (as you've noticed), and love his use of them in his artistic commentaries!

Tuesday, September 30, 2014

When the Roommate Gets Mad...

For some reason, I have a lot of sunglasses.  Actually, I know quite well why: I'm a fair-haired, blue-eyed human who's lived most of her life at high altitudes or in very sunny places, or both.  Skin & eye cancer are both worries, so I always wear sunglasses.  However, I never pay more than $8-10/pair (honest, guv!), and sometimes even less (i.e., free Bike To Work Day specs!). 

But where to keep them has always been a problem. At various times they've lived on top of shelves, in a small table by the front door, or in a cardboard box in a shoe cabinet.  I have scoured the web & Etsy, looking for one great idea, and typically only found something that stored 2-3 pairs (haha!).  My last try at organization was this hanging shelf/hook/bin combo, no longer available at Crate & Barrel, which is pretty great and worked okay. Except trying to get one pair out usually meant 2-3 other pairs fell out; not the best way to have a smooth entry at 6:45 a.m. And there are hooks underneath those specs, which go to waste.  Plus everything was unstable, so the slightest flounce of a raincoat or scarf often meant a cascade of glasses, scaring the cat & irritating the Roommate.  

(This is all in the mudroom, BTW.  We have almost no storage by our front door, so it would be even messier if I tried to move them out there.)

Which brings me to the Roommate.  He rarely makes any type of negative comment about something I'm doing (I really have to be doing something bad or ridiculous), so when he became quite irritated last week & said, "Well, it wouldn't be such a problem if you didn't have so many. And we can't even use the hooks!"  Which is a reasonable comment.  So I got to thinking about what I could make that would fit all my sunglasses, but not take up too much space and would work with the hooks on the bottom of a mirror we already have there.  

I had some heavy duty interfacing (possibly for a smocking idea), so decided to use that, plus scraps. At first I was thinking I'd make narrow pockets.  But I ran that idea by a coworker who suggested grosgrain ribbon sewed at varying widths and angles. I don't have any grosgrain, so decided instead to make strips, also out of scraps.  I'm so glad I got her opinion (thanks!).  

You can see it here, on the left.  I made a little strap with a snap to go through the triangle-shaped hangers that were on the mirror when we bought it (I've never figured out what they could be for), so it didn't make a new hole in the wall.  

It's not super pretty, but I just wanted to use up stuff, so wasn't worrying too much about matching.  I also suspected (and I was correct) that once I got all the sunglasses on it, the mismatched fabrics wouldn't show.  

As you can see, it's got plenty of work to do! When I showed the Roommate, he was super impressed (he always is--enthusiasm honed from years of being an elementary teacher).  

Now they are easy to find, easy to take out and put away & there's plenty of room for more!  

Best of all, the original organizer is more useful, now, too.  We're making good use of the hooks and the pockets, as you can see below...  


Tuesday, September 23, 2014

Meanwhile...back in DC


Apologies for not having anything to show in the way of sewing; I'm hoping to do some finishing this weekend. 

 In the meantime, I wanted to let you know about ScrapDC's Rebel Craft Rumble, which is this Saturday evening, 9/27/14, in DC's hoppin' Columbia Heights!  If you've ever wondered what Project Runway would look like when crossed with Iron Chef, here's your chance to help out plus support ScrapDC, a non-profit which inspires environmentally sustainable creative re-use!  

Tuesday, August 26, 2014

What I'm Working on (More on Vintage Pledge 4) #vintagepledge

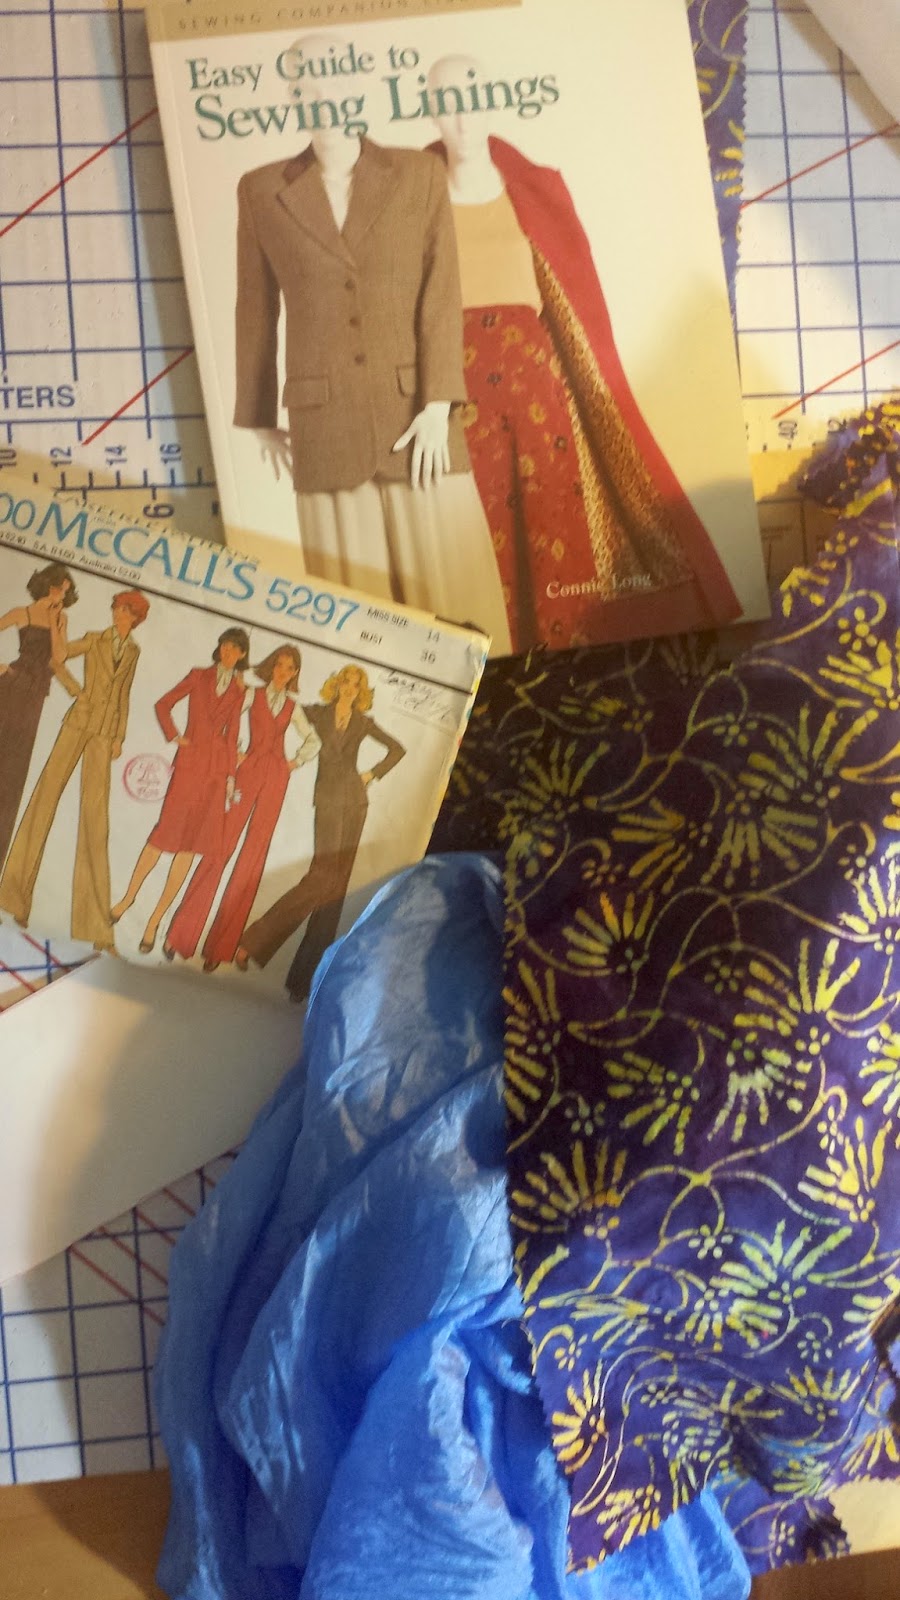
Brief update on my Vintage Pledge 4, McCall's 5297. (See last week's post for my rant on fitting.) You can see the gorgeous batik I'm using for the jacket (on sale at Hancock), and the blue is some silk I've dyed to match for the lining.  And speaking of linings, there's Connie Long's masterpiece, Easy Guide to Sewing Linings.  

About that silk (which I also used on this Vintage Pledge item), it's silk habotai, 5mm weight, from Dharma Trading.  In order to get a "deal," I bought a whole bolt (about 50 yards).  I must be nuts!/But it was a deal!  I'm slowly getting through the 50 yards, but it will take a while.  If I ever get all the projects done that are in my head, it will be used up; I promise.

I also would like a bolt of 8mm habotai.  This 5mm silk is lovely, but very light, and it needs to be sewed down as it doesn't have enough weight for gravity to keep it down.  For example, I'm thinking of making a slip with it.  And I will probably just double the fabric for all the parts, so there's a bit more weight and it will behave under a dress.  

Also, I mostly buy my dyes from Dharma, too, because silk dyes are special.  Meaning that if you buy non-silk dye (like Rit), it will work great on cotton, but won't do a thing for your silk.  Follow directions carefully, and don't use your dying utensils for anything but dying.  I keep all these items in our basement, well away from the kitchen.  

Finally, I'm still having a few more fitting issues, but I think I'm pretty close to getting this pattern modified to suit me.  If I get a princess-seamed jacket that fits me out of this torturous fitting process, I will be pretty darn happy.  Wish me luck!  

Tuesday, August 19, 2014

Vintage Make Four Progress Report: McCall's 5297 from 1976!

Sometimes I'm not sure why I sew.  It makes me pay a lot more attention to my body much more than I like to and I usually end up feeling like I'm a freak because NO pattern ever fits right out of the envelope!  And then I decide, "Well, I can modify this so it will fit really well."  Even though previous fitting experiences have been quite frustrating, with no clear lessons learned, and no actual pattern at the end that I feel can be used again...so frustration without reward.  As I said, why do I sew?!  And why do I think I can make something fit?!  

Sorry for the rant!  Onward!  
This dress needs a matching jacket.  I have tried a couple of different versions of the one in the pattern (See & Sew B5699), but wasn't thrilled with them.  They're okay, but not that great.  So I was getting ready to go ahead & cut my lovely navy wool & silk/rayon lining (thank you, Mood!), and decided, no, let's try something else.  Digging through my pattern boxes, I came across McCall's 5297 from 1976, which my mom gave me recently. (I think she might have made it for my sister?  I don't remember it being for me.)  Anyway, the jacket looks good, it's with princess seams (which always work better for me), and I just want to shorten it & round it a bit, so it's a bit more like this Mohammed-Make out of some of my beloved West African fabric. I get a lot of use out of this jacket, wearing it over tops or by itself with skirts and dresses.  

So I started a toile/muslin.  And was quickly reminded that even though princess seams are pretty good for fitting me, they're not perfect either...even this wonderful jacket from Mohammed is too loose at the waist.  So, I started playing with 5297 & ended up making it a bit more like the one above. Specifically, that meant turning the front side piece into 2 pieces, like the jacket above.  Essentially I went from 4 jacket front pieces (not including lining & interfacing) to 6.  It took lots of cutting & trimming & pinning, and of course I'm not 100% sure it's right, but I found some free cotton I'd been given & decided to try it all out.  If that works, then I'll get to work with the wool.  You can see to the right that I did lots of tracing/drawing and modifying.  

Frankentoile!
I used lots of scraps from other projects & from old sheets I get at Goodwill.  You can see my Frankentoile to the left, using 4 different pieces. 

One thing that is good (I guess) is that most pattern pieces fit me perfectly through the back.  It's sort of amazing how I match that part so well.  At least I don't have to fuss with that.  Just the sides & front!   

By the end of the day, I had the cotton version cut out, put in a new needle, wound a bobbin & did the back neck darts & center back seam.  A day spent fitting & cutting out & even making a bit of a start on the actual sewing...not too bad!  


Tuesday, August 12, 2014

A Few Small Items Finished

I really need to get cracking on See & Sew B5699, the jacket anyway, so I've got something new to wear this winter.  However, I got some free fabric a few weeks ago and decided to use some to make a new nightgown, and to finish up a smocked pillow that has been laying around for months.  So here are those 2 items, which have cleaned off my sewing table, giving me plenty of room to get that wool out & start cutting!  

The mother of a colleague taught Home Ec & Sewing in a public school in Pennsylvania for years.  And she has a ton of fabric.  My colleague is trying to get her to start cleaning out her basement, so she brought me a bag.  

This 100% polyester is something I'd never buy.  But since it's pretty & feels silky, I thought it would make a good nightgown...and I can always use more nightgowns.  Years ago I bought a nightgown which I really liked, but it finally wore out.  Since then I've made 3 which are essentially copies of it.  This is one of them.  It's a quick project & I like how slick & silky the fabric feels. 

And this morning I finished another smocked pillow!  Again, some fabric I got free (on www.freecycle.org); it's a light denim and there wasn't much (less than 1/2 yard), so a pillow seemed like an obvious project.  As with nightgowns, I can always use another cushion cover & I enjoy all the different textures created by the smocking around the house.  

I have only been using smocking on household items, but here's an amazing example of smocking on a dress, from a sister-blogger, from a 1960s pattern.


Tuesday, August 5, 2014

Slenderette Tropicale - Simplicity 2847, 1958 - Done!

This is my third Vintage Pattern Pledge item for 2014!  It's also the 3rd 
Simplicity 2847 Slenderette pattern I've made; older ones here.  I love a shirtwaist!

And here I am modeling it in front of our garden, which we began working on in earnest this year (as opposed to just mowing the grass & ignoring it).  It's coming along quite well & is mostly native plants now. We've been in the house 3 years now, and have done lots inside...it was time to stop being bad neighbors & spruce up the front.

The Roommate & I also made the low slate wall you see...we are inordinately proud of it & it looks great--really adds a lot to the yard.  All of which is a way of saying, this is why I haven't been sewing much, and why the one thing I have been sewing has taken forever!

Another reason it took forever?  Because it's fully lined with silk & I used Hug Snug seam binding all over the place.  It looks great inside, as you can see. 

I do love this pattern!  It's got pockets, which I always look for on a dress. 

It's a really interesting pattern also because the bodice front & back have the sleeves built in...meaning no sleeves to inset, which I hate.  

It does have lots of buttonholes, though, which makes up in difficulty/impatience for the lack of sleeves!  

 The buttons are juniper, and we got them in Tallinn when we were there about 2 weeks ago.  I bought 8, not really sure what I'd do with them, and then got home & realized they'd match perfectly with the Tropicale.  


I get a lot of use out of my other Slenderettes, so I'm expecting to wear this quite a bit over the next few months before fall sets in.  


Tuesday, July 29, 2014

From the Collection: Children's Hats from SW China - The Best is Last?

I mentioned that the Roommate & I often try to buy things in sets of three. Not sure why we do that, but it's a habit we've tried to keep up. Of course sometimes we cannot resist & we buy some other odd number of items (7 Ethiopian pillows, for example). Anyway, the best of these three amazing items, another child's cap from SW China, which we bought in Dali in 1994.

The front of this has an overlapping leaf design, and YES, that is real hair, braided & woven with some wire to make super-scary horns.  Wouldn't any child feel protected wearing this cap?  

I'm guessing it's also from the Bai people, but I need to do some more research.  We got them all in Dali at the same time.  

BTW, they were made for wearing--all three have chin-straps.  

Enjoy the details below...


Note: Clicking on the photo will bring up a much larger version for your perusal.

Tuesday, July 15, 2014

From the Collection: Children's Hats from SW China - 2nd Entry

Another child's cap from the Bai people in SW China.  The first in this little series is here. Gorgeous embroidery & details on this scary face.  Not sure what's in the nose--it's quite hard, and feels like it might be wood?  I am especially partial to the teeth! I also love the mouth & eye details, including super eyebrows, which reminds me...

You'll be glad to know the Roommate & I try to shop in threes...so another one is coming (and I've saved the best for last)!

Tuesday, July 8, 2014

From the Collection: Children's Hats from SW China!

The Roommate & I will be on a big trip thru Finland & Iceland to celebrate our 30th wedding anniversary (yes we are proud!), so the next few weeks I'll be sharing a few items From the Collection. I hope you enjoy these lovely examples of folk art.

Think about this: you're a parent in pre-science culture.  You see the high death rate of children, especially babies.  Even if you have a clue about clean water or immunizations, you have no way to put that knowledge into daily use.  So you might try other methods to ensure the health & success of your baby.  These children's hats, richly embroidered & decorated, are an attempt to ward off evil spirits, while also ensuring luck, wealth, happiness & longevity. 

The scary face would definitely give an evil spirit a fright, don't you think? 

This hat is from the Bai people, an ethnic minority in
SW China (we purchased this cap in Dali in 1994). 

The exquisite embroidery, along with the fake fur, and a little trapunto (for the nose), give this cap a distinct personality.  I imagine a little boy or girl would be thrilled to wear such a scary cap, the equivalent of the superhero capes Western children wear.  The row of Buddhas will bring luck and wealth.  

Lotus embroidered on corduroy
used for the back of the cap. 

The lotus flower (above) endows purity on the wearer while the bird may mean a messenger or a shaman.  I can guess, but really, will never know what the mother or grandmother or aunt or sister was thinking when she made this treasure for a new member of the family. 

I'm a librarian, so compelled to include a bit of reading in case you'd like to find out more:
Symbolism in Chinese Children's Hats & Baby Carriers (2007)
and even more reading (on the Bai & Miao, but other ethnic minorities, too)!

Tuesday, June 17, 2014

English Paper Piecing + West African Prints = Super Cool Clock!

Piece By Number
I really don't like doing handwork, and save up any hemming or button reattachments into a group...then do all the torture at once, usually while watching a DVD.  However, a post on SewMamaSew inspired me to give English Paper Piecing a try.  If you'd like some history, or more info, please check out this PDF from the International Quilt Study Center at the University of Nebraska, Lincoln.  

I knew I wouldn't have the patience for a very big project, so what to do? 


Inspired by a Japanese folded paper technique (kanzashi) I saw in the book, Fabric by Fabric: One Yard Wonders, I decided to make a clock face.  (See Erin's using kanzashi here!)  I also wanted to use my dwindling supply of West African fabrics. The Roommate collects clocks, and our sun room has 5 on different time zones. So I had the idea and the fabric, but wasn't interested in trying kanzashi, so what to do?

A bit of googling found the Piece by Number site, where I found a pattern called Circle of Geese.  The pattern is here (another PDF). You can see her example up there to the left; isn't it pretty?  


A close-up of mine in the photo to the right. So many tiny stitches!  Almost can't believe I did that... 

Paper piecing is a real hassle: sew everything to a piece of cardboard, stitch them together, unsew to get the pieces of cardboard released and do it again.  I was thrilled I only had to repeat the block 3 more times!  I thought it would get easier with repetition, but it didn't! Honestly, it was just as much of a pain the 4th time as the first.  However, you can see that it's a great way to make little pointed pieces all come together.  

I finished it, but the Roommate & I decided that the hands didn't show enough, especially from a longer distance away. So I took the hands off and traced them and tried to fashion some triangles with interfacing.  I think buckram would have been better, but here's what happened...

I think it looks great!  It will be a striking addition to our clock collection & a fun way to use up some of my fabric scraps from a great shopping trip!

What do you think?  

Thursday, June 12, 2014

I'm Sewing Away on a Vintage Pattern Pledge Item, But...


The title above is true, I swear! However, I'm using Hug Snug & lining it with silk as I go along...which means it won't need much finishing when it's done. (Hug Snug tutorial here.)  On the other hand I spent a lot of time on it yesterday & didn't even finish the top.  So it's slow going.  

But just to give you a glimmer, here are a few photos of what I'm working on...
Hug snug & silk lining! 


Couldn't resist this ethnic-y fabric, called Tropic Traveler.

Tuesday, May 27, 2014

Special Guest Blog Post! On Seamstress Erin's Blog...

I was quite fortunate to be asked recently to write a guest post (as an overeducated seamstress) on Seamstress Erin's blog, so I wrote about what I love most (besides the Roommate & Bella): travel & textiles!  

In honor of Erin's recent completion of her PhD, she's asked a bunch of other overeducated sewists to blog. My post is about textiles we collected in Ghana, Japan, Thailand & Ladakh.  

Congrats to Erin; thanks for the honor...and my apologies for being a bad sewing blogger right now.  The weather is amazing here (eternal spring!), and we have been spending a lot of time working on our yard (after 3 years of doing almost nothing).  We're building a rock wall now!  

Finally, if you liked my country music clothing posts (after a trip to Nashville), you might enjoy this article about a new photography exhibit in LA (Country Music Icons).  Of especial interest is a photo of Gram Parsons in his leather suit, along with Nudie Cohn, the tailor who designed many of the amazing outfits seen in these photos & in my older posts. 

Tuesday, May 20, 2014

It's Always a Quetzal Kind of Day...


Bella & I both like birds.  So when we're traveling (me & the Roommate, not me & Bella), I'm on the lookout for any natural history included on artwork. Especially birds!  This beautiful huipil from (probably) San Miguel Chicaj, has lots of quetzales.  All overlapping in what is quite an intricate geometric pattern.  Did she embroider by rows, swapping colors?  Or by color?  In knitting I know it would be by row, but I'm not sure about embroidery.  

Here's what I love about handmade art: Take some basic elements such as simple repetition, color change, concentric shapes, parallel lines, etc., none of which are difficult to embroider, or to imagine.  But in the right hands, WOWZA!  


Border detail; love the zig-zag & suns!

Overlapping quetzales
(Note: The photos are small on this page, but click on them to see the full-sized versions & admire the detailed handwork.)

Tuesday, May 13, 2014

It's a Quetzal Kind of Day!

Unless you're an avid birder, or into punk-rock hairstyles, you may not know what a quetzal is. Well, for one thing, quetzales are the national bird of Guatemala.  The money is also called Quetzales--I love that!  
Source
I haven't ever seen one in the wild...not for lack of trying.  The Roommate & I have spent lots of times traipsing in rainforests, following a guide, trying to see through dripping leaves & damp binoculars.  
Source
They are well & truly amazing, and are a common icon for all types of artwork, whether it's for a Mayan ruin, or a huipil, a woman's tunic.  

I've mentioned before that styles of huipiles are fairly useful to determine the wearer's hometown.  

Here another from our collection of 7 (never enough!), both with quetzales as the extremely amazing subtle, repetitive, interlocking embroidered icon.  I cannot think of enough adjectives to describe my feeling of wonder when I look at these works of art!  

(Note: The photos are small on this page, but click on them to see the full-sized versions & admire the detailed handwork.)

From Quetzaltenango (place of the quetzales), here's a masterpiece.  BTW, I'm not 100% sure of the origin of this item.  If you know better, please leave a comment for me!  If you want a glimpse into the complicated world of Guatemalan geography & huipile art, check out Huipils, for their list of towns, each with distinctive embroidery & weaving styles.  


Embroidered quetzales--perfectly kerned!  

 The mini zipper at the neck is so charming.

Each shoulder has a band of velvet.

What's fascinating to me about this particular huipil is that it looks to be made of a basic cotton rice or potato sack, then heavily embroidered with the kerned quetzales in multiple colors. THEN, a completely different design & type of embroidery was applied with finer thread.  At first I was sure that this was machine embroidery, but after some thought, I don't think it's very likely on a huipil that is a at least 25-30 years old.  
From reading about these vertical bands, they were apparently first used to disguise seams when narrow bands of fabric had to be pieced together.  Because they were so beautiful, when wider base fabric became available the decoration was retained, though it was no longer needed.  

Stay tuned.  I'll have another huipil up next week.  Comments/Questions?  Let me know.